
You need to replace the brake booster when your car’s brakes don’t seem to be working properly.
A brake booster is a vacuum-powered machine that increases the pressure applied to the brakes.
It works by drawing power from the vehicle’s vacuum system and helping the ABS system exert the right amount of pressure on the brakes to make them work properly.
How to know if a brake booster repair is necessary?
The easiest way to know is to check if your car’s brakes are working correctly. Do you need to apply more pressure than usual to stop the car?
Does your vehicle take longer to stop after pressing the brake pedal? If yes, you probably need to replace the brake booster.
A faulty brake booster can lead to serious accidents. Therefore, you should address the issue as soon as possible. Discover the process of replacing the faulty brake booster with a new one:
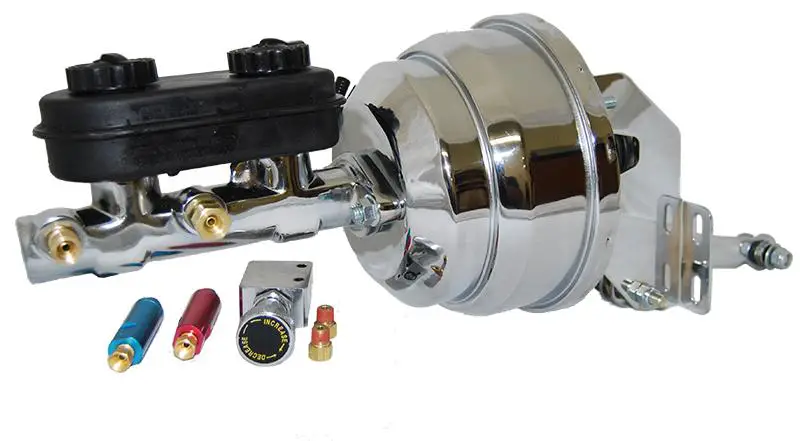
Brake Booster Replacement: Tools and Supplies
- Screwdriver
- A socket wrench
- A tube nut wrench
- Brake fluid
- A floor jack
- A new brake booster
Brake Booster Replacement: Instructions
The brake booster is placed behind the brake master cylinder’s firewall. So, lift the car from that side with a jack and remove the tires.
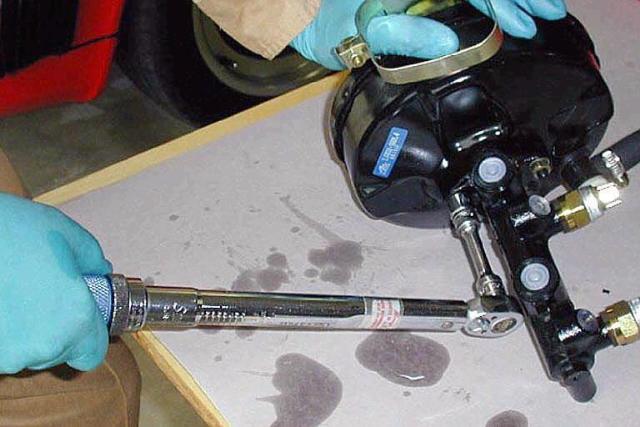
Disassemble the master cylinder. Open the metal brake cover using a socket wrench to access the master cylinder.
Use the tube nut wrench to loosen the tube nuts of the brake lines that are connected to the master cylinder. Disconnect the cylinder from the brake lines using an open-end wrench.
Check the master cylinder to see if it has a leak or a defect. Proceed to the next step after inspection.
Remove the faulty brake booster. You will see the brake booster after removing the master cylinder. Disconnect it from the brake pedal and the vacuum hose by removing the nuts connecting it to the brake pedal.
Next, remove the bolts that keep it attached to the firewall. This way, you can completely disconnect it from the master cylinder.
Attach the new brake booster. Position the new brake booster in the place where the old one was. Attach it to the firewall by turning and tightening the bolts and nuts. Then, attach it to the brake pedal.
Reconnect everything. In this step, you will need to reconnect the brake lines and the master cylinder to the brake booster. You will need to fill the master cylinder with brake fluid in case it is empty.
Attach the tires, remove the jack, and start the engine to check if the braking system is working correctly.
FAQ
1. Can weather conditions affect the brake booster replacement process?
Extreme temperatures can affect some components you will handle during the replacement process, such as seals and the behavior of the brake fluid.
Cold can make rubber seals harder and more brittle, which can complicate their installation. Similarly, high temperatures can make some plastics and rubbers too soft. It is best to work in a temperate and stable environment.
2. Is there a way to test the functionality of the new brake booster before completing the installation?
Before fully attaching the new brake booster and reassembling all components, you can perform a preliminary check by ensuring the brake booster maintains vacuum. With the engine off, press the brake pedal several times to eliminate residual vacuum.
Then, while pressing the pedal, start the engine. The pedal should noticeably sink toward the floor if the booster is working correctly. This test confirms the booster’s ability to provide power assistance.
3. How do the make and model of my vehicle influence the choice of a replacement brake booster?
Brake boosters are not universally interchangeable between all vehicles due to differences in size, mounting configuration, and vacuum requirements.
Make sure to select a replacement part specifically designed for your vehicle’s make and model. Using an incorrect brake booster can lead to brake malfunction or installation issues.
4. What specific tools might I need that are not found in a standard toolkit?
Replacing a brake booster may require vehicle-specific tools, especially for detaching the master cylinder or the brake booster itself from the firewall. These may include special sockets for wrenches.
Additionally, a vacuum pump may be needed to test the booster’s vacuum capability.
5. Can replacing the brake booster affect my vehicle’s ABS system?
Although the brake booster itself is a separate component from the anti-lock braking system (ABS), care must be taken not to introduce air into the ABS module when disconnecting and reconnecting the brake lines to the master cylinder.
The presence of air in the ABS system may require a more complicated bleeding process, sometimes needing professional equipment to operate the ABS valves correctly.
6. After replacing the brake booster, why might the brake pedal feel different?
The brake pedal feel may change due to the new brake booster providing a different level of power assistance than the old one, especially if the old brake booster was failing and not providing adequate assistance.
A slight adjustment period is normal, but if the pedal feel is significantly different or does not return to normal after a few drives, recheck the installation and bleed the brakes to ensure there is no trapped air in the system.
Final Words
Considering these unusual aspects of brake booster replacement can help ensure a smoother repair process, enhancing both safety and performance after replacement.
Always consult your vehicle’s service manual for specific instructions and precautions, and consider seeking professional assistance if you encounter difficulties during the replacement process.