It’s normal for your car to have a problem, or when you want to add features to your car that require soldering. Crimp terminals are effective, work well, and are sometimes necessary, but corrosion can set in and cause connection issues over time. Knowing how to solder wires properly is a useful skill to learn because it’s the best bet for a lasting repair. You might feel a bit intimidated if you’ve never done it before, fearing you’ll cause damage and mess everything up. Fear not, this article will solve your problem with tips and tricks and what you need to watch out for to solder like a pro.
1. Safety Measures
- Use safety glasses in case the solder splatters or splashes so it doesn’t get into your eyes
- Be careful around soldering irons; they get very hot
- Do not solder around flammable materials
- Before starting, make sure to disconnect the battery before soldering, and any carpet or plastic trim is protected from molten solder if you’re soldering inside the car. It’s best to place something non-flammable under the area where you’ll be working
- Work in a well-ventilated area to avoid breathing in solder fumes. Otherwise, use a fan to blow the smoke away from you
- Because we’ll be using lead in the solder, always clean the work area and your hands thoroughly, especially before handling food.
2. Choosing Materials
- Choose the right types of solder that are used for electrical soldering. Do not use silver solder as it’s for soldering pipes and sheet metal, and its acid core will damage plastic insulation over time.
- You can choose between lead and lead-free solders, but people generally prefer lead solder because it can penetrate wire strands better and has a lower melting point. If you’re unsure whether the solder you’re using is lead or lead-free, try melting it to see: leaded is shiny while lead-free is duller.
- Using rosin paste flux is a great way to prevent oxidation and make your soldering much easier and longer-lasting. Apply it to the joint and let it melt before adding solder. But remember not to use acid flux.
3. Getting to Work
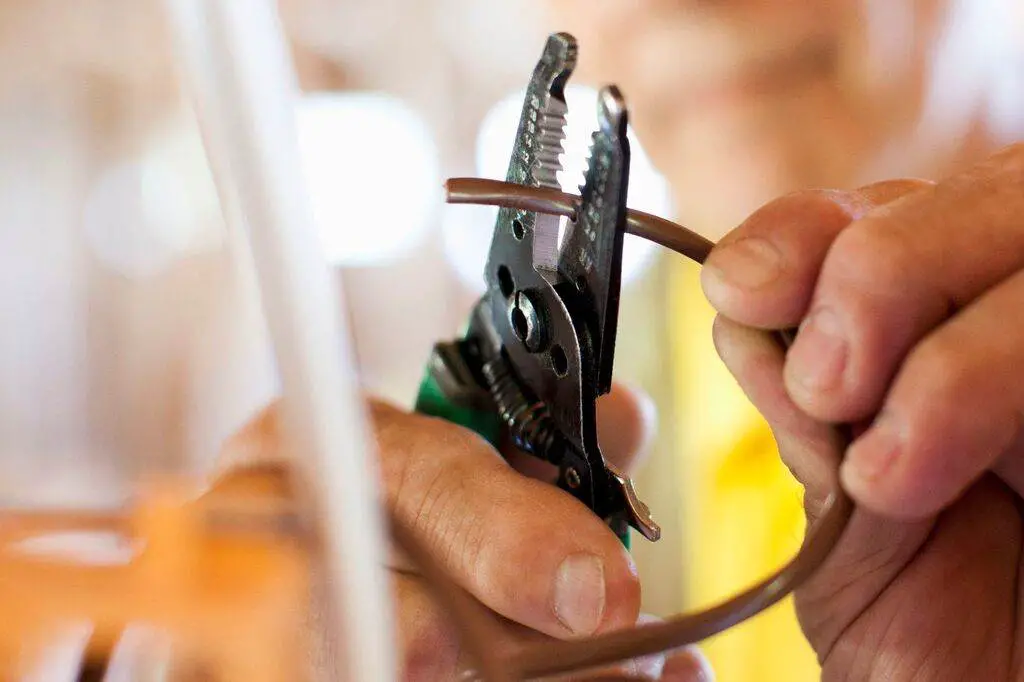
- Be careful when stripping the wire so you don’t break the wire strands. This would make soldering harder and the wires could melt and cause a fire. If you do it by mistake, simply cut the wires and strip them again. Remember to strip the same length on both wires.
- Heat shrink tubing will shrink to about half its size when heated, so choose one that barely fits the size of your wires. Slide it over the wires BEFORE soldering and make sure it doesn’t stay too close when you’re working because the heat can shrink it before the job is done.
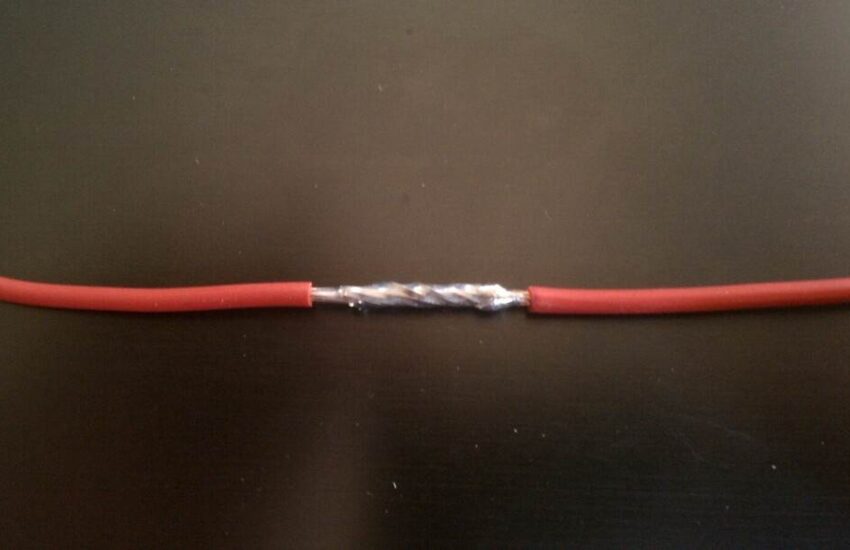
- You have two ways to connect the wires together. The first is to untwist the strands, spread them out a bit, then interlace the wires and twist them together. If you don’t have much space or length to do that, you have the second method, which is to firmly twist the strands of both wires first, make an X, and twist them around each other. Either way, don’t let the end of the strands stick out as they will pierce the heat shrink and cause a short circuit.
- You should use a helping hand or wire holder when working because it will be more stable and easier to solder. If the clip is too tight and sharp and might pierce the wire insulation, you can cover them with heat shrink sleeves.
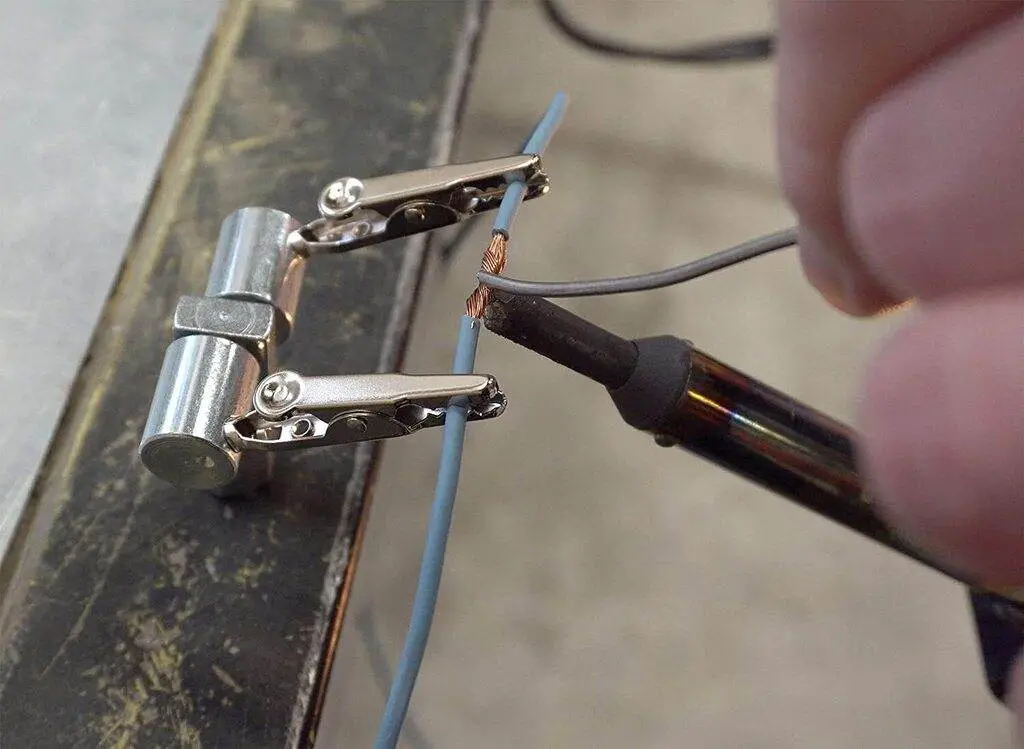
- After heating the soldering gun, don’t solder right away and first wipe it on a damp sponge to remove oxidation. You should have the tip tinned, not bare, for better heat conduction to the wires and to prevent the iron from oxidizing. To tin it, simply heat the gun and add a bit of solder to the tip, then wipe it on the damp sponge, leaving only a thin layer of solder.
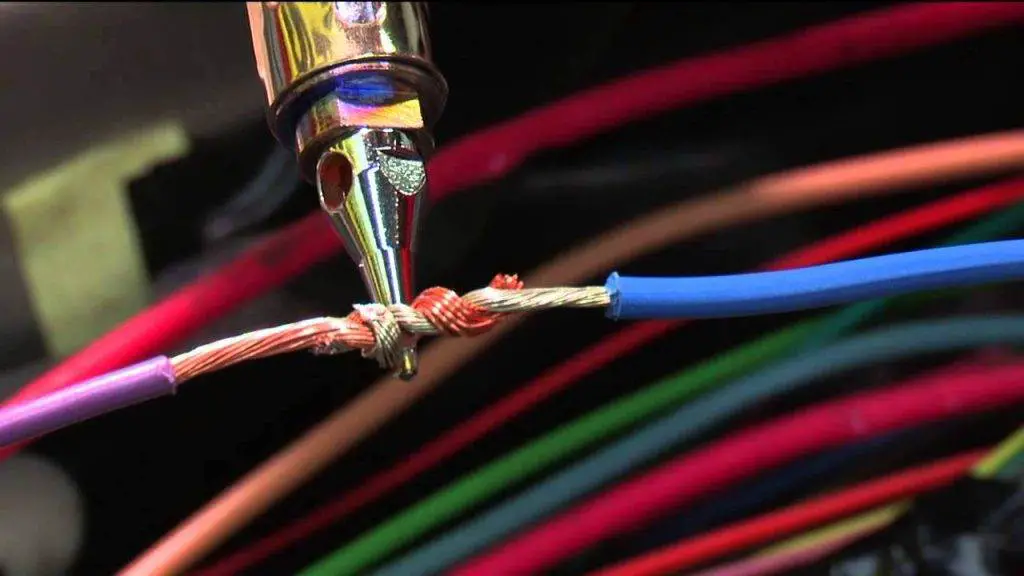
- When you start soldering, always place the tip of the gun UNDER the wires and add the solder from the TOP; solder is drawn to heat, so as the solder melts, it’s pulled toward the heat, through the wires, connecting each strand with solder. Adding a bit of solder between the tip and the wire is a good way to get better heat transfer.
- Let the wires heat up first for a few seconds, then start introducing the solder into the copper strands, let it penetrate through the strands. Add only just enough to cover the strands and avoid making blobs. A good soldering job should have the outline of the wires visible without any copper parts exposed. Avoid making a cold solder joint, which is when the wires aren’t heated enough, so the solder only covers the outside of the wires instead of flowing between them.
- Always clean the soldering gun tip by wiping it on the damp sponge while the tip is still hot. This is to ensure you have a clean tip every time you work with it and to make the tip last longer and perform better.
- Don’t touch the joint until it’s completely cooled; touching it while the solder is still in liquid form will move the wires and could create cracks or air voids in the solder.
- It’s recommended to apply silicone paste or dielectric grease to your joint before sealing everything up. This will make the solder last longer and be waterproof. After applying it, slide the heat shrink over and start heating from the middle outward to push out any excess silicone or grease.
- Electrical tape is OK, but most people don’t use good quality tape. If you must use electrical tape, and sometimes you can’t avoid it, there’s a specific brand and model you need – 3M Super 33 or Super 88. The $1 per roll tape is undesirable and should absolutely never be used on electrical wire connections unless it’s an emergency repair. Super 33 and Super 88 cost about $4 to $5 per roll, and it stays on, sticks, and seals connections without falling off four months later.
And that’s it, that’s how you solder wires together. It’ll be much easier for you now, won’t it? If you have other questions, check out the Maintenance Tips; we have all the answers you want to keep your car in perfect condition!