
Tears, rips, and burns in your car seats can make your car’s interior look shabby and worn out. Do your own upholstery with our guide!
Having a tear or hole in your car seat upholstery can be incredibly frustrating. Unlike so many other problems related to your car’s aesthetics, nicks in the upholstery don’t just disappear with a simple wipe or easy replacement. They can make your car’s interior look poorly maintained and unkempt. Worse still, the longer they stay there, the more likely they are to get worse. A small hole turns into a small tear, which turns into a rip, which becomes a gaping giant gash with foam escaping that you can’t take your eyes off!
Taking your car to a garage to have the upholstery repaired or changed can be very expensive, but it’s also something you can do yourself. It’s not always easy to repair or replace car covers and you may need tools to do it, but with a little patience and our comprehensive guide, you can certainly do it. There are a variety of options for renewing the upholstery and there is a wide range of replacement kits available to completely replace car seats or materials that will help correct problems. Whatever type of material your car seats are made of and whatever the problem, we have some ideas and tips to get rid of your tears and make your car look factory-fresh again.
TYPES OF UPHOLSTERY
Before you can repair your car seat cover, it’s important to know what type of material you’re dealing with, as they all have different characteristics and require several different approaches.
Car seats are usually covered with one of the following materials.
- Nylon is one of the most common types of automotive upholstery and is known for its durability and ability to withstand heavy use. Nylon is quite porous and will pick up dirt and debris every time you drive your car, so even without tears, you might decide to replace your nylon sooner.
- Polyester is another popular choice for automotive upholstery and it’s designed to look like suede. This soft fabric is quite comfortable but can tear and rip easily.
- Vinyl has been a popular upholstery choice for a long time due to its strength and ease of cleaning. If it tears or a hole appears, it can be a bit more difficult to repair.
It may look like leather, but it’s a smart, animal-friendly imposter: faux leather upholstery is a popular choice for luxury cars, and it’s relatively easy to keep clean, strong, and scratch-resistant. - Leather seats are often a sign of a high-end luxury car. Leather upholstery requires special maintenance and cleaning products to keep it looking sharp, but it’s extremely durable and strong. However, it is much more difficult to repair than other, cheaper materials. Repairs on leather, especially new or light-colored leather, can also be very visible if not done correctly.
COMMON UPHOLSTERY PROBLEMS
Some of the most common problems people see with car seats are tears or rips. These can come from clothing catching on the seat or luggage or other objects cutting into it with hard or sharp edges. Frayed seat edges or seams are also a common problem and mainly come from age alone. Seams can also become unstitched, although this is unlikely. Burns, often caused by cigarettes, can also damage the surface of your seats. There can also be problems with car seat padding. If there is a tear deep enough, the padding can come out, or it can simply become too compressed and no longer supportive. Specifically for leather or vinyl, the seat may start to “crack” or show imperfections, such as small scratches. All these different problems will need to be dealt with in a different way,
TOOLS NEEDED
The tools you’ll need of course differ depending on what needs to be repaired, but these are tools you might find useful for general repairs or for car upholstery maintenance.
- Clean cloth(s)
- Canvas patches serving as seat back support
- Fine or medium sandpaper
- Leather repair kit, paints, or pre/post treatment solutions (depending on the type of repair)

- Tweezers
- Scouring pads
- Putty knife
- Rubbing alcohol
- Scissors
REPAIRING MINOR ISSUES
To start, let’s address some of the most common minor problems such as tears and rips. Before starting however, it’s important to recognize that if you do it yourself, a repaired seat tear will never be completely unnoticeable. If you want it to look like new, you’ll need to take it to a professional upholstery shop.
SMALL HOLES, TEARS, RIPS, OR BURNS IN CLOTH/FABRIC CAR SEATS
The best way to repair fabric seats is usually to use a patch on the seat cover to hide this type of wear and support the remaining seat fabric. You’ll want to try to find a patch that not only matches the color of the seat you’re working on, but also the type or pattern, and find a material that has the necessary strength to handle regular use. It’s worth asking for recommendations at a local garage or checking online if you can find a specific fabric for this type of repair.
You’ll need to cut the fabric to match the size of the hole in the fabric or the length of the tear before applying it to the seat. It should comfortably cover the hole or tear, but it’s up to you to determine how much excess material will join the current seat fabric. This can then be placed directly over the hole or small tear and, hopefully, blend seamlessly into the seat cover.
You have two options for applying the patch: use an adhesive patch or sew or stitch the material directly onto the seat. Most patches can be attached using contact adhesive, usually available as a spray. You can also use heat (from an iron or heat gun) to ensure a strong bond on the material. Some people worry that if they don’t sew it, it won’t be as effective, but the adhesive works just as well.
TEARS IN CLOTH/FABRIC SEATS
For a tear or rip more than a few inches in diameter, a patch won’t be suitable; it will leave the seat ugly and mismatched. Professional repair is always the best bet from an aesthetic standpoint in this situation, but there are DIY options available, the first of which is to re-stitch the tear.
Using a curved needle and thread, hold the two sides of the torn fabric together and stitch the tear using an X-stitch from top to bottom. Over this, you’re going to apply a larger patch, so that initial X-stitch will hold the sides together under the patch. From there, it’s very similar to the process described above. Choose a patch that matches the seat cover fabric and use an adhesive to cover the seams. Here, you won’t need to use too much adhesive; it’s the stitching that holds the seat together and not the glue.
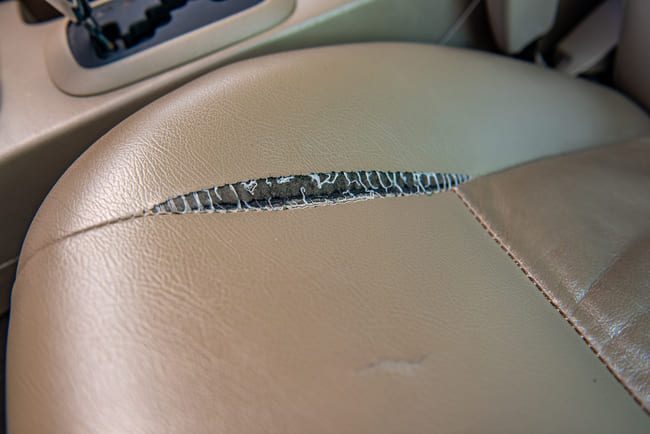
TEARS IN LEATHER, FAUX LEATHER, OR VINYL
Tears on leather are slightly more delicate than tears on fabric seats, mainly because the material is different and requires much different treatment.
When the seat fabric splits and it’s not right against the seams, we’re in a good position because we have access to the back of both sides of the tear. Our solution is going to be to glue a piece of fabric (not leather, just ordinary fabric) to the back so that the two sides come together, and any gap can be filled with a filler specially designed for leather seats.
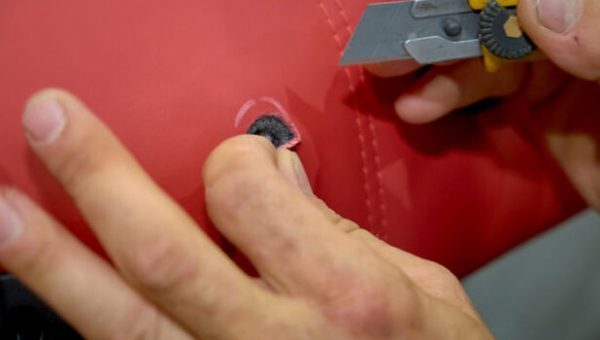
The first step is to ensure that the fabric, whether it’s leather, vinyl, or faux leather, is not connected to any seat padding or any other material that might be used to secure it; we just want to be able to access the fabric itself. If it is connected, you may need to use a piece of plastic or a knife to release the material from the padding, but be sure to do so carefully.
Next, apply adhesive to the patch. You won’t need to use much here, but enough to ensure it sticks on both sides. Slide it behind the seat cover and make sure it touches both sides. Take the two sides of the tear and hold the gap closed while the glue dries (this isn’t as easy as it sounds). It’s important to use an appropriate patch fabric. A piece of strong suede or duck cloth used for uniforms works well. The critical factor for the woven fabric is that it doesn’t stretch or change shape when subjected to stress, i.e., when you sit on it! If the color closely matches the seat, that’s a bonus.
Next, you need to apply a weight or constant pressure to the area so that the patch adheres effectively to the adhesive, as the glue can take some time to dry. This can be done using any type of weight or a pressure clamp to hold it in place.
The surface of the leather is always curved, due to the padding pushing it up, so you need to press hard enough to flatten the curve. If the tear is quite large, be sure to use a weight large enough to cover almost the entire space. If you don’t, one side would be overpowered and that could mean the gap tightens and worsens further. If possible, use clamps to reduce the gap while applying pressure. As for the adhesive you use, it’s best to look for a specific fabric adhesive. We’ll come to a few good brands for this later.
If the leather is thick, once the gap is closed, you can use a filler material to bring it back to an even surface. Various fillers will work and see below again for some product recommendations. The main requirements are that it is flexible, non-shrinking, and can be colored or painted in some way.
CRACKS, CREASES, AND HOLES IN LEATHER OR VINYL
Repairing cracks and creases in leather and vinyl is also a bit more complicated than dealing with fabric seats. However, there are many more products that can help in this process, so don’t be discouraged!
The first step is to ensure the seats are perfectly clean. Using specific leather seat cleaning products will ensure that any fillers or sealants used will truly adhere and apply well to the surface of the leather seats.
For small cracks, a temporary solution may simply be to use a leather color restorer or restoration product. These are widely available and will simply add color to the faded leather. They won’t change the surface but will give the appearance of new leather. This is only a very short-term solution, however.
For small holes, a leather and vinyl compound or coating can be used to fill the void. These can then be painted to blend into the leather seat (although for this to be effective, the entire seat really needs to be coated). Some are heat-activated, meaning you’ll need something to heat the liquid. Using a small trowel or spatula, you can insert and spread the filler into the holes. You need to do this in stages and layers to create the best finish and the strongest repair. Layer by layer, slowly fill the hole until it is flush with the surrounding leather. Feel the surface with your fingers to make sure it’s truly flat and level. Different products will need to be applied in different ways, so check the instructions provided with each product. Once you’re satisfied that the layer is relatively flush with the rest of the seat,
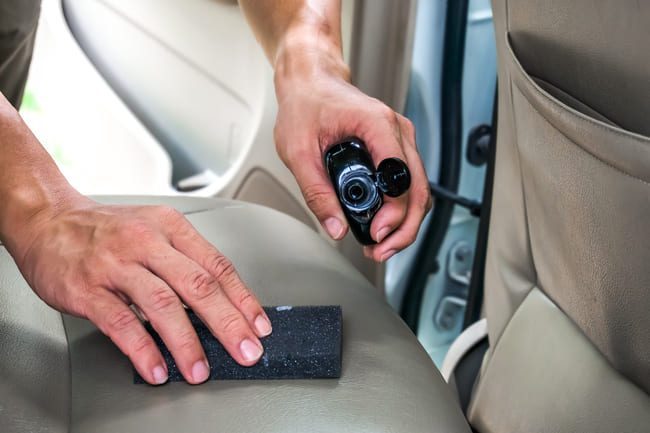
For anything more than discoloration and more severe cracks, heavier repairs are needed. Use masking tape to cover any parts of the seat that are not leather, for example the plastic bracket used to adjust the seat tilt angle or any fabric under the leather, then use fine sandpaper to level the existing damaged leather and remove any loose or compromised leather, creating a uniform, flat surface. There may be a lot of peaks and valleys or leather that is lost, but it’s important that the surface is as flat as possible by sanding or cutting off these protruding pieces. If we get the surface as even as possible, we won’t need to use as much filler and it will look much better and last much longer.
As with small holes, for our cracks, we’re going to use a leather or vinyl filler. Many of these are specially designed to reduce the appearance of cracks and can take about 20 to 30 minutes to dry and seal. They are often not heat-activated, but a heat gun can of course speed up the process. Spread the filler or putty evenly over the cracks and try to ensure it blends seamlessly with the surface, wiping off any excess. Apply only a small amount at a time using a spatula and your fingers in tight areas and be sure not to overdo it. Once you’re satisfied that the gaps have been filled as much as possible and the seat looks relatively even, sand lightly to remove any tiny ridges or uneven surfaces created by the filling. You can repeat this as many times as you like to get the best surface.
If cracks have completely worn through the seat, especially on the seat’s curvature, it may need to be re-stitched and replaced. There are limits to what you can do with products designed to repair small cracks, but these can still be smoothed using fillers and painted to match. The end result won’t be perfect, but will be cosmetically and aesthetically better than before and it can strengthen the area to prevent further damage.
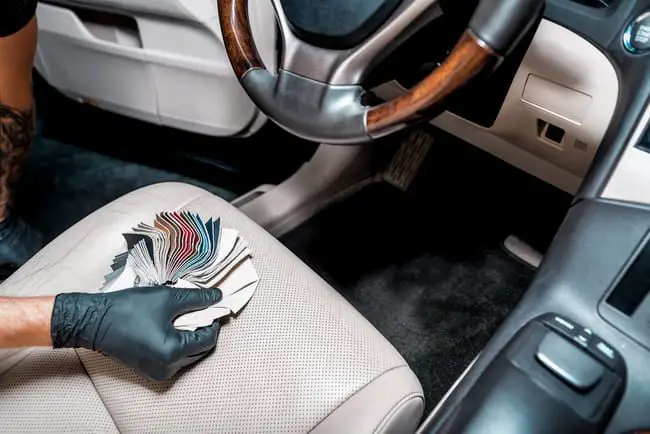
PAINTING LEATHER

Once the cracks and holes have been repaired, it’s time to paint. Use a topcoat color selector to help you choose a shade to paint the seat. There are a variety of products to do this, but Global Smart Repairs offers a particularly good range to help you mix and match/find the right color.
Once you’ve selected your color, use a spray gun to paint the entire seat, not just the affected area. This will ensure it’s not obvious that an area has been repaired. Apply the paint evenly and not too thickly, keeping the air spray gun close to the surface so that the paint is smooth and still wet when it touches the surface. You should aim to find a good distance and keep moving while you paint, aiming for a light but adequate coating. The paint must be specially designed for leather and normal water-based paint won’t cut it. Water-based paints have poor durability and lack chemical and UV resistance properties, as specific leather paints should. Once you’re satisfied with the paint job, you can apply a protective coating to further increase durability.
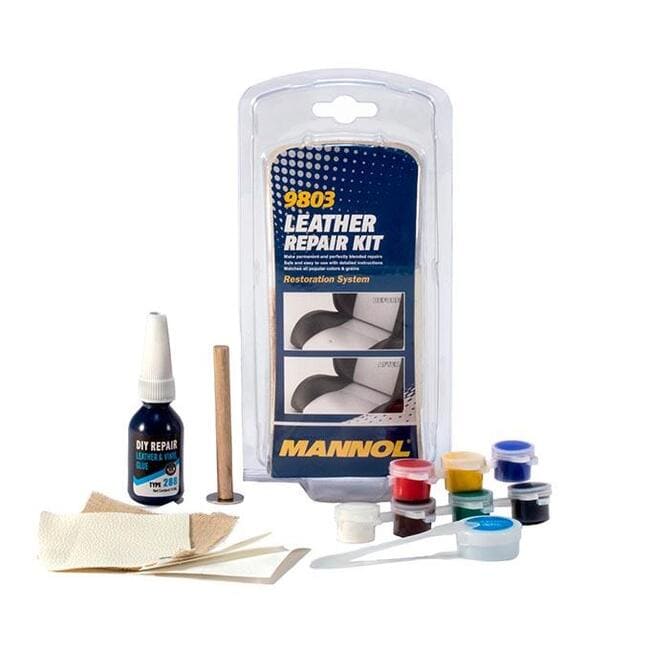
LEATHER REPAIR KITS
When it comes to leather repair, many kits are available with