Looking for how to install a front-facing camera for your car?
Where to place it, how to wire it, and what tools are needed? Many owners find themselves at their wit’s end with these questions. Honestly, it’s not surprising!
This guide walks you through the installation and wiring of your front dashboard camera step by step. Written simply, you can follow it even if the topic is completely new to you.
Follow this guide to learn how to install a front-facing camera and wire your equipment effectively.
Complete guide to learn how to install a front-facing camera.
We will explain:
- What you need to prepare (tools and accessories).
- How to physically install the camera.
- How to connect the power supply (wired or wireless).
- How to route and hide the wires neatly.
What is a single front-facing car camera?
A front-facing car camera is a small recording device mounted inside your windshield. It films the road ahead of you while driving. Unlike dual cameras (front + rear/interior), this configuration only covers the front.
Most are powered by the cigarette lighter socket or the vehicle’s fuse box. Some models (often called “wireless front parking cameras”) connect via Wi-Fi to your phone and record to a memory card. They usually start with the engine and are placed discreetly behind the rearview mirror so as not to obstruct your view.
Essential tools and accessories
Before you begin, gather these basic tools. Most are included with the camera or easily found in an auto store:
- The dash cam: Your main device (a single front unit).
- The power cable: USB or 12V (cigarette lighter) plug to connect the camera.
- Fuse kit (Recommended): Essential if you want to wire directly to the fuse box (for a clean look or to activate parking mode). Ex: Wiring kit compatible with your model.
- Trim removal tool: Indispensable for routing wires behind panels without damaging the interior trim.
- Cable ties or zip ties: To secure and organize wires neatly.
- Quality microSD card: To store your recordings. Opt for a fast and reliable card, recommended by the manufacturer.
- Isopropyl alcohol wipes: To perfectly clean the mounting area on the windshield and ensure optimal adhesion of the mount.
Even for a wireless front parking camera (which reduces wiring), having these tools on hand before starting will greatly simplify the installation.
How to install your front-facing camera?
Installing a single front-facing camera is straightforward. Whether you power it via the cigarette lighter or the fuse box, the key steps remain similar. The key: take your time and hide the cables properly.
Step 1: Choose the ideal location
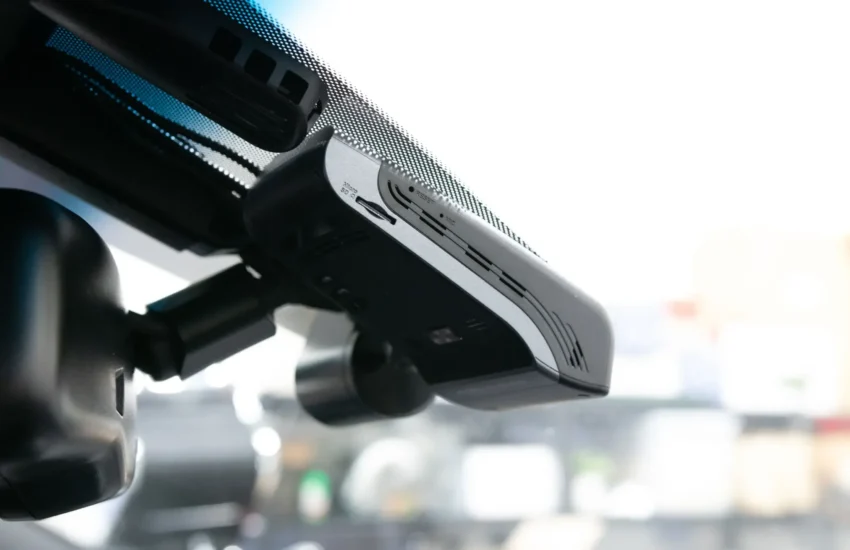
- The standard location is right behind the center rearview mirror. It’s discreet and offers a clear view.
- Test the angle BEFORE sticking it permanently! Temporarily plug in the camera (via the cigarette lighter, for example) and check the view on the screen or app. Adjust the position if necessary (not too high, not too low).
Step 2: Clean the windshield thoroughly
- Use the alcohol wipes to deeply clean the exact area where the adhesive mount will go. Remove any trace of dust, grease, or haze for maximum and lasting adhesion.
Step 3: Attach the camera mount
- Remove the protective film from the mount’s adhesive.
- Apply it firmly to the cleaned area and hold with firm pressure for 15 to 30 seconds. Adhesive mounts (more common and reliable than suction cups) require this crucial step for good adhesion.
- Clip or screw the camera onto its mount according to the model.
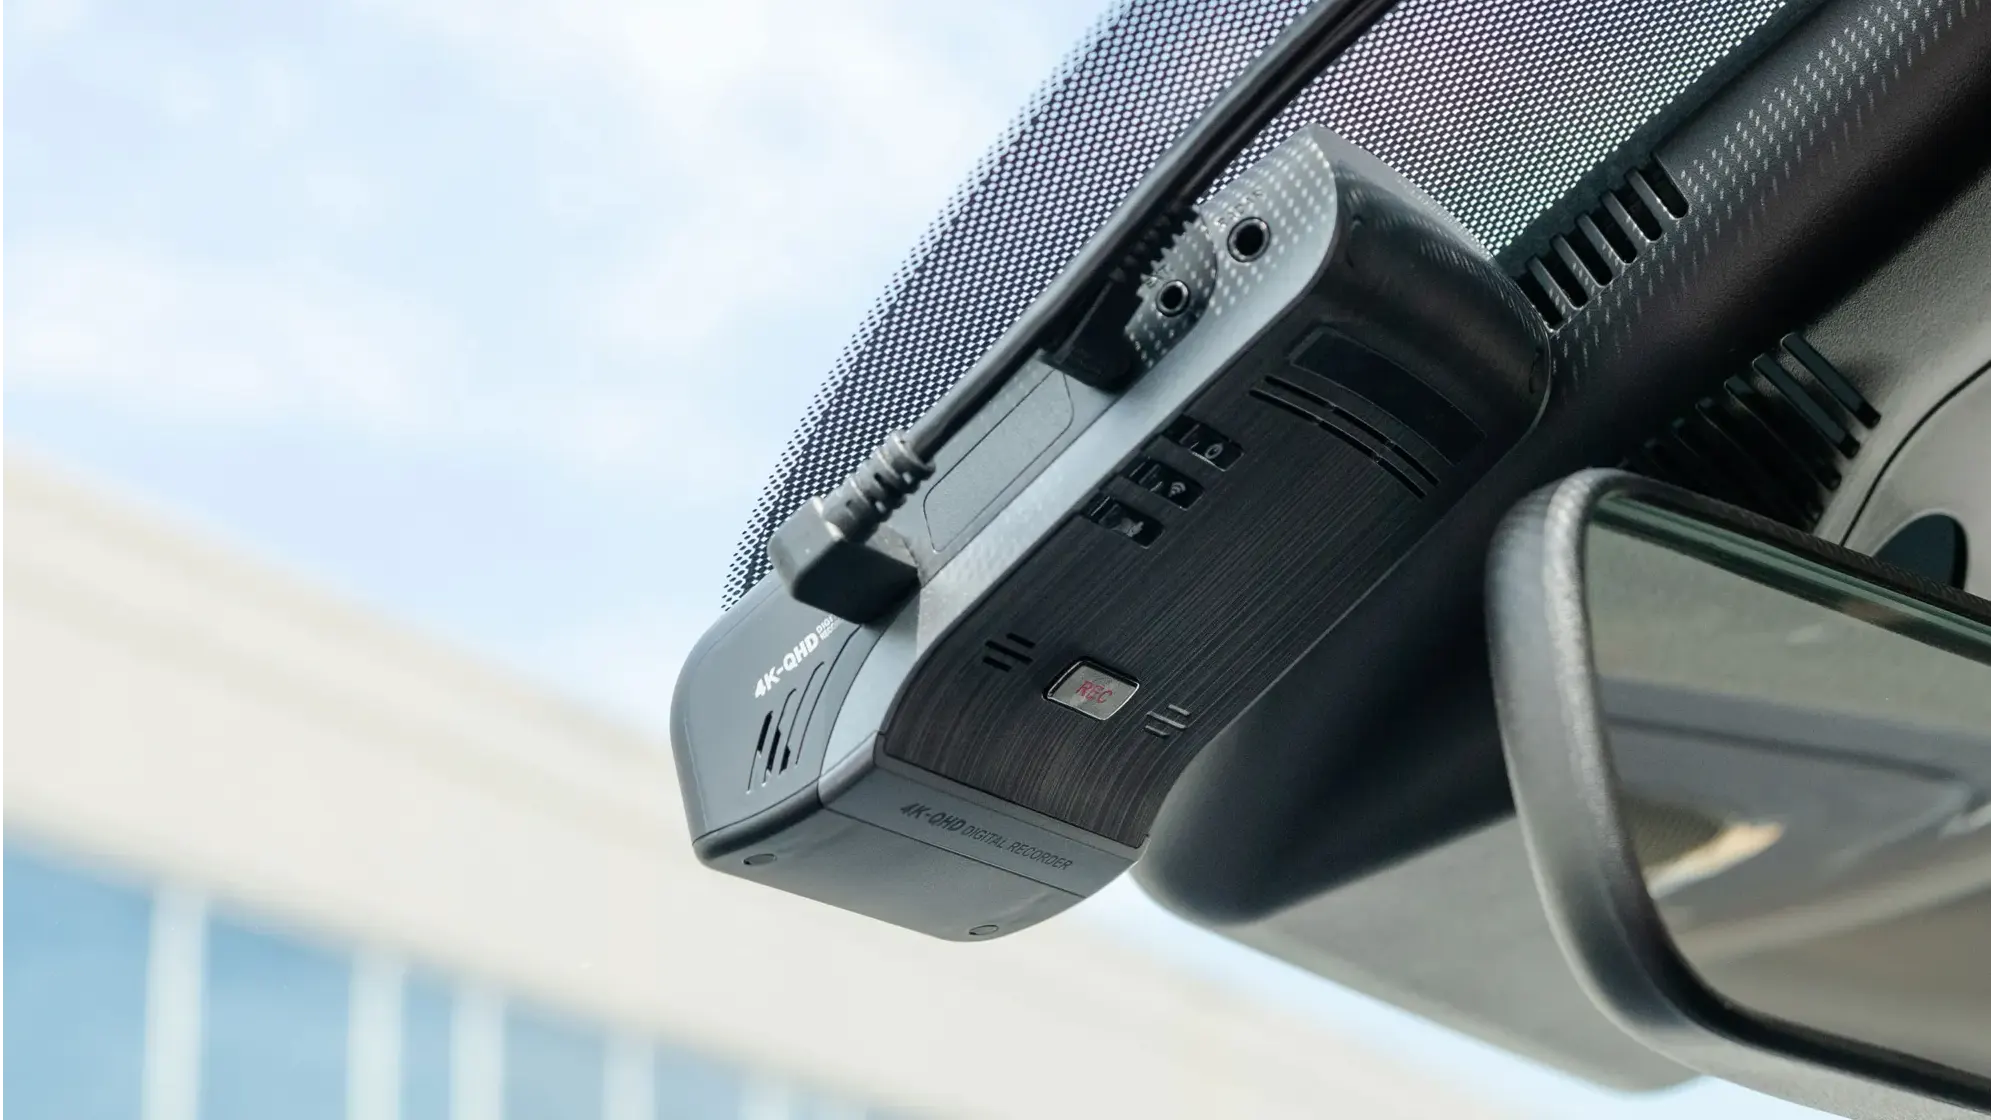
Step 4: Connect the power supply (2 options)
- Option 1 (Simple): Cigarette Lighter
- Simply plug the provided power cable (USB or 12V) into your car’s cigarette lighter socket.
- You will then need to hide this cable (step 5).
- Option 2 (Clean + Parking Mode): Fuse Box
- Use the provided fuse wiring kit or one purchased separately.
- Identify an “accessory” (ACC) or “ignition” (IGN) fuse in your vehicle’s fuse box (consult the owner’s manual).
- Connect the red wire from the kit to the chosen fuse (via the kit’s add-a-circuit fuse tap).
- Connect the black wire to a good ground (a bare, clean body screw).
- Plug the kit’s connector into the camera’s power port.
- This method often allows activation of parking mode and offers a clean look without dangling wires.
Step 5: Neatly hide the wires
- Using the trim removal tool, route the power cable discreetly:
- From the top of the windshield (near the camera), along the headliner/ceiling (under the trim).
- Then go down along the A-pillar (pillar between the windshield and the front door). Caution: ABSOLUTELY AVOID the areas of the curtain airbags! Route the cable behind or away from “AIRBAG” labels.
- Continue along the dashboard to the cigarette lighter socket or fuse box (often located in the lower dashboard on the driver’s side or in the glove box).
- Use cable ties or zip ties to secure the wire to existing harnesses or provided anchor points. The goal is to have no visible wires and no wires dangling or at risk of getting in the way.
Step 6: Test your installation
- Start the engine. The camera should turn on automatically.
- Check that recording starts (indicator light, notification on the screen if present).
- If your camera is wireless (Wi-Fi), connect your smartphone to its network and open the associated app (e.g., Redtiger App, Viofo, etc.) to:
- Check the live view and angle.
- Verify that recording is working.
- Configure the settings (resolution, G-sensor, etc.).
- Check the proper functioning of parking mode if you used the fuse kit and your camera supports it.
Pro Tips for a Perfect Installation
A few tips make all the difference:
- Test the angle BEFORE sticking: Temporarily connect to validate the view.
- IMPERATIVE Cleaning: Alcohol wipe on the glass for optimal adhesion.
- Respect Airbags: Never route a cable in front of or obstructing a curtain airbag. Follow existing wire paths.
- High-End SD Card: Avoid data loss with a fast and reliable card (Class 10, U3, Endurance).
- Label if necessary: If you add accessories or make multiple connections, label the wires.
- Fuse Kit for Parking Mode: If your “wireless front parking camera” supports it, the fuse kit is essential for powering it in standby mode.
Common Mistakes to Avoid at All Costs
- Sticking the camera without testing the angle ➜ Unusable footage.
- Neglecting windshield cleaning ➜ Camera falls off.
- Running cables near airbags ➜ Serious safety risk.
- Using a low-quality SD card ➜ Corrupted or lost recordings.
- Leaving wires visible or dangling ➜ Visual distraction and potential hazard.
- Forgetting the fuse kit for parking mode (if needed) ➜ Feature disabled.
Final Thoughts
You now know everything you need to install your single front-facing camera yourself, whether it’s wired or wireless. We’ve covered:
- What a single front-facing camera is.
- The precise list of necessary tools and accessories.
- The step-by-step installation process (location, cleaning, mounting, power, hiding wires, testing).
- Professional tips for an impeccable result.
- The critical mistakes to avoid.