
Cars showing signs of shaking during acceleration are one of the signs that drivers need to clean the oxygen sensor. We can completely clean the oxygen sensor at home with extremely simple steps. Let’s explore in depth how to clean the O2 sensor.
Something You Need to Know About O2 Sensors
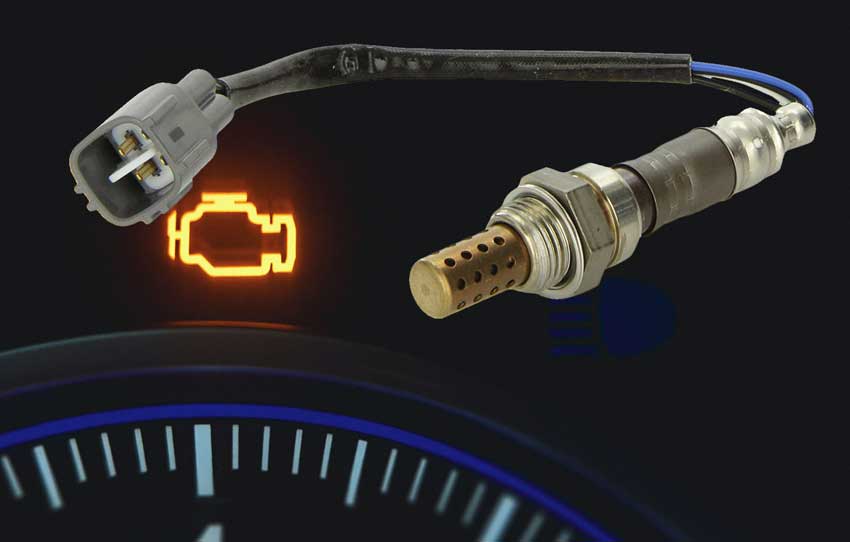
An oxygen sensor is also called an emissions sensor. It is one of the most important sensors in a car’s engine system. The main function of the oxygen sensor is to measure the residual oxygen concentration in the car’s exhaust gases. Then, this data is sent to the car’s ECU so the engine can adjust the fuel fill level accordingly, which helps ensure performance while complying with vehicle emissions regulations.
Where Are Oxygen Sensors Located?
An oxygen sensor is usually located in the threaded hole just in front of the engine’s exhaust catalyst. The exhaust catalyst is usually placed near the end of the exhaust manifold, behind the muffler. Vehicles with many cylinders will often have many sensors mounted in the branches of the exhaust system. In some models, the manufacturer installs an oxygen sensor at the rear of the exhaust kit. However, the task of this sensor is solely to assess the exhaust gas processing capability of the exhaust catalyst.
How Does an O2 Sensor Work?
The oxygen sensor is one of the important parts of the engine system. A faulty sensor will prevent the engine from reaching its optimal power. So, how does the oxygen sensor work?
The exhaust is discharged and passes through the oxygen sensor; the contact between the exhaust and the sensor probe will cause the sensor to generate an electric current whose voltage is inversely proportional to the oxygen content in the exhaust gases. If the oxygen content is high or if the air mixture is a “lean mixture,” the voltage generated by the oxygen sensor will be about 0.1 V. If the oxygen content is low or if the air is a “rich mixture,” the voltage generated by the sensor will be about 0.9V. Based on this potential, the ECU will adjust the fuel injectors’ opening time appropriately so that the intake air mixture has an air/fuel ratio close to the ideal ratio.
What Happens When Oxygen Sensors Fail?
When the oxygen sensor breaks, you will see certain symptoms:
Increased Fuel Consumption
When the data transmitted to the ECU is incorrect or no signal is transmitted. At that point, the ECU can only calculate the amount of fuel based on the intake air flow sensor, unable to analyze it accurately because it doesn’t know the amount of oxygen after combustion. This causes that even if there is less oxygen in the exhaust gases, the amount of fuel injected is still high, causing “excess gas,” which makes the car consume more fuel than usual. This fuel consumption can gradually increase if not corrected quickly.
Car Exhaust Smells Like Gasoline
If the car smells like gasoline, it’s likely that your engine’s oxygen sensor is malfunctioning. Because at that time, too much gasoline is pumped into the combustion chamber, the gasoline is not completely burned, so it is discharged through the exhaust pipe, creating an unpleasant smell.
Check Engine Light Is On
The Check Engine light is responsible for notifying when the engine or related parts have an error. Therefore, if you see the Check Engine light on, it’s likely that the oxygen sensor is malfunctioning.
Why Do You Need to Clean the Oxygen Sensor?
To drive with the best performance, the function of the sensor components on the car must be utilized optimally. In particular, the oxygen sensor is an electronic device mounted in the exhaust ducts, in direct contact with the emissions from the engine’s combustion chamber. Therefore, this sensor will perform the task of measuring the quality of the emissions. Then send a signal to the ECU to evaluate and adjust the fuel ratio as well as the amount of air entering the combustion chamber to the most appropriate.
With this role, the oxygen sensor in the car directly affects the vehicle’s performance, avoiding errors such as unstable speed, slow acceleration, and fuel consumption,… Furthermore, it also ensures standard emissions and does not pollute the environment. Therefore, drivers should check the oxygen sensor, recommended 1 to 2 times a year. This will ensure the early detection of problems for cleaning, repairing, or replacing the oxygen sensor, ensuring stable performance.
Note: You must keep in mind that oxygen sensors will not get dirty unless you have serious problems like a bad fuel injector, faulty spark plugs, or cracked ignition coils.
How to Clean the O2 Sensor: 6 Simple Steps

Some car owners wonder: “Can you clean an O2 sensor?“ They don’t know if cleaning an oxygen sensor and then putting it back in place can be an effective method when the O2 sensors have a problem because often, it’s pointless to waste your time trying to clean this sensor when it needs to be replaced. Regarding this question, our answer is “When you notice symptoms of faulty oxygen sensors. We advise against cleaning them; replacing them entirely might be a good solution. Because oxygen sensors are fragile and very sensitive. It can be completely broken if you don’t use an appropriate chemical to clean it.
However, when checking the O2 sensors, if there is no damage requiring replacement, and you want to save some money. Drivers can clean the oxygen sensor to ensure its longevity as well as the functions to run smoothly and efficiently.
Step 1: Prepare the Tools
The tools needed to clean the oxygen sensor include:
- Wrench to remove the oxygen sensor.
- WD-40, gasoline, or carburetor cleaners are the solutions to help remove and clean the oxygen sensor effectively.
- Soft brush to remove “stubborn” dirt.
- Soft towel: dry the sensor after cleaning.
- Additionally, you should also prepare extra gloves and glasses to avoid getting stuck with gasoline and cleaning solutions.
Step 2. Locate the Oxygen Sensor
First, you need to take the car to a spacious place with adequate lighting; you can lift the car to make it easier to locate the oxygen sensor. Then, depending on the model and brand, the number and location of the oxygen sensors may differ. So read the user manual to know the exact position of the sensor. Note that it is necessary to disconnect the power before affecting the sensor, to avoid causing unintended damage. Typically, cars will have at least two oxygen sensors: one located in front of the catalytic converter and the other located behind the catalytic converter.
Step 3. Remove the Oxygen Sensor
After locating the oxygen sensors, spray WD-40 evenly and wait 10 to 15 minutes. This solution has a lubricating effect, making it easier to remove the sensors. Then use a wrench to carefully remove the oxygen sensors from the vehicle to avoid damaging other components.
Step 4. Clean the Oxygen Sensor with Specialized Cleaners
Using gasoline to clean the oxygen sensor is relatively simple. Drivers just need to put all the sensors in a barrel or basin, using plastic or stainless steel, then fill it with gasoline. Then cover the lid and let it soak overnight or for at least 8 hours. The gasoline will clean the plaque and dirt on the oxygen sensor.
Step 5. Clean the Oxygen Sensor with a Soft Brush
After soaking the oxygen sensor in gasoline. If there are still stains, you can use a soft brush to gently scrub to remove long-standing plaque. Drivers should be careful to scrub gently, ensuring the dirt is completely removed. And should not use too much force as it could damage the sensor.
Step 6: Dry and Reinstall the Sensor
Once the cleaning process is complete, use a paper towel or a soft cloth to dry the oxygen sensor. Then, install the sensor in its original position, using a wrench to tighten the bolts, to avoid a loose installation causing problems when the vehicle is running.
Thus, in just 6 simple steps, drivers can clean the oxygen sensor themselves at home, both saving money and helping their car run more smoothly.