Changing a flat tire is one of the most common roadside breakdowns. A simple nail or sharp object can quickly turn a peaceful journey into a stressful situation. Whether it’s a standard or tubeless tire, it is absolutely not recommended to continue driving on a flat tire, as it risks severely damaging the rim, suspension, or even causing loss of vehicle control.
However, many people do not know how to proceed, even though all the necessary equipment – spare tire, jack, and lug wrench – is usually found in the trunk. This article guides you step by step to safely replace a flat tire yourself in just 10 to 15 minutes.
Step 1: Find a Flat, Stable, and Safe Location
As soon as you notice a loss of pressure or abnormal vehicle behavior, immediately turn on your hazard lights (warning) to alert other drivers. Drive gently to pull over to the side of the road, preferably choosing a parking area, lot, or a clear emergency stopping lane.
Choose ground that is as flat and hard as possible (avoid loose soil or slopes). Once properly parked, engage the parking brake and put the car in gear (first or reverse) to secure the vehicle and prevent any movement during the operation.
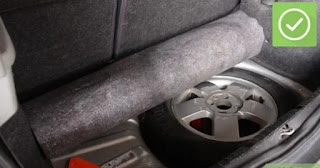
Step 2: Prepare the Vehicle and Loosen the Lug Nuts First
Before lifting the car, take the spare tire, jack, and lug wrench out of the trunk. Locate the specific lifting point indicated in the owner’s manual (often a notch or sturdy reinforcement under the door sill, near the affected wheel).
Place the jack at this spot but do not lift the vehicle yet. Use the wrench to slightly loosen the lug nuts of the flat tire by turning counterclockwise. Do not remove them completely; just break their initial tightness. It is much easier to do this when the wheel is still on the ground.
Step 3: Lift the Vehicle in a Stable and Secure Manner
Now you can operate the jack to lift the vehicle. Do so slowly and steadily, ensuring the jack remains straight and stable. The tire should be sufficiently off the ground (about 2 inches) to allow removal and replacement with the spare tire, which is usually inflated and therefore taller.
⚠️ Crucial Safety Tip: Never place any part of your body under the vehicle when it is raised by the jack. The jack could fail.
Step 4: Remove the Flat Tire and Mount the Spare Tire
Once the car is raised, you can finish unscrewing the lug nuts and carefully remove the flat tire. Place it flat under the vehicle’s chassis, near the jack. This extra precaution provides passive safety in case the jack fails.
Then, position the spare tire onto the studs, aligning the holes. Screw the lug nuts on by hand in a crisscross (star) pattern to ensure the wheel is perfectly straight and balanced. Tighten them as much as possible by hand to avoid moving the vehicle on the jack.
Step 5: Lower the Car and Tighten the Lug Nuts Finally
Lower the vehicle using the jack until the spare tire lightly touches the ground. Remove the flat tire from under the car. Then use the lug wrench to tighten the lug nuts as firmly as possible, still following a crisscross tightening pattern. This ensures even clamping and prevents wheel warping.
Lower the vehicle completely and remove the jack. Perform a final check by tightening all the lug nuts one last time. Carefully store the flat tire, jack, and wrench in the trunk. It is imperative to have the flat tire repaired or replaced as soon as possible, as the spare tire (often a temporary “donut” spare) is usually a temporary solution with speed and distance limitations.
Conclusion
Knowing how to change a flat tire is an essential skill for every driver. By following these 5 methodical steps and always prioritizing your safety, you can turn a stressful breakdown into a simple formality. Remember to regularly check the pressure of your spare tire and the condition of your equipment to be prepared for any eventuality.