Reasons Why Your Battery Won’t Hold a Charge
When your car’s battery discharges shortly after the engine is turned off, it is usually caused by one of three things:
Your battery may have reached the end of its lifespan (often 4 or 5 years).
A parasitic drain is depleting the battery.
A problem in an electrical system is affecting the battery’s power.
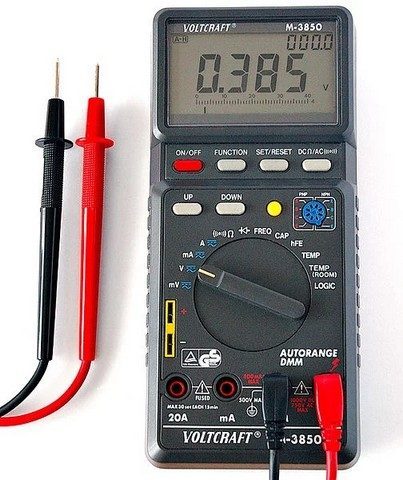
Many battery-related issues can be diagnosed at home with a visual inspection, a digital multimeter, or an inexpensive hydrometer, available at most auto parts stores.
This guide shows you how to apply simple tests to find the cause of your battery failure. These tests are easy to apply for the average car owner. Nevertheless, you will be advised when it’s time to take your battery to a store, if necessary, to confirm a diagnosis.
So let’s see why your car’s battery won’t hold a charge.
Find out why your battery won’t hold a charge
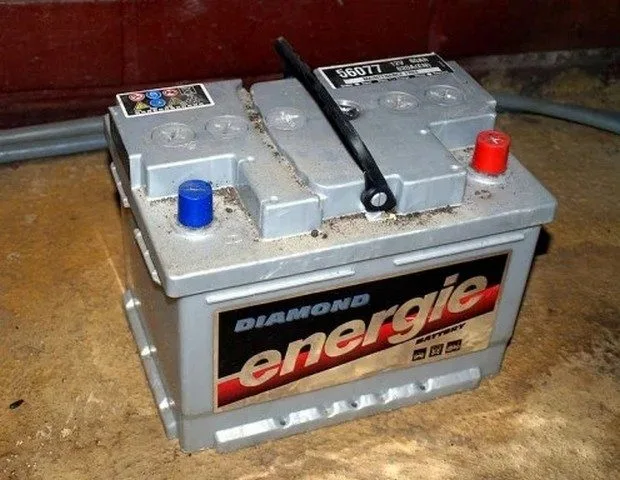
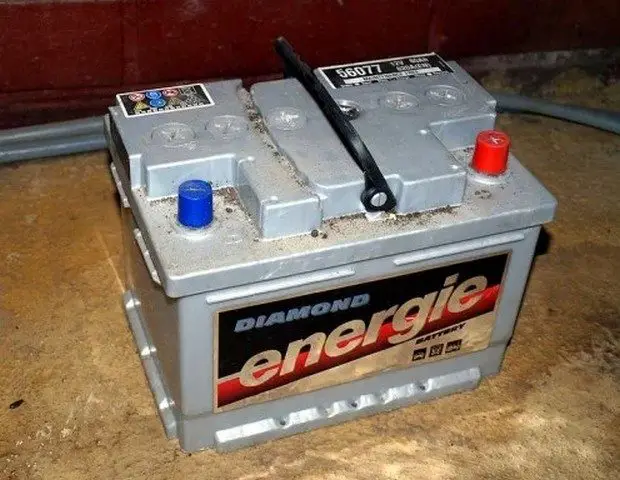
Inspect the battery.
Perform a battery terminal test.
Clean the battery terminals.
Perform a battery voltage test.
Perform a quick charging system check.
Check for a battery leak (and fix any leak).
Perform a battery drain test.
Perform a hydrometer test.
Perform an alternator diode test.
Check other potential battery drainers.
Instructions and tips for each of these tests are included below.
1. Inspect the Battery
Many times, problems with a battery that won’t hold a charge can be attributed to poor battery maintenance. For example, you might forget to check the battery’s electrolyte level, check for corrosion or loose terminals, or ensure the battery is secured to prevent physical damage.
Start a battery discharge diagnosis with a visual inspection. A simple inspection can help you quickly spot issues that can lead to battery problems.
For a better inspection, it’s a good idea to disconnect the battery and check it on a bench or similar surface. However, before disconnecting the battery terminals, you may want to use a memory saver to keep the computer’s memory alive and other electronic device settings (see the Save Your Computer’s Memory box below).
If you don’t want to buy a memory saver now, you can use a 9V battery instead. Connect the 9V battery to the car’s battery terminals before disconnecting the cables.
Once you have your car’s battery on a bench,
check the battery case and posts for damage;
check the electrolyte level, if your battery has removable caps;
and check that the case is not bulging.
If the battery is damaged, replace it. Also ensure all holding hardware is in place and clean the battery tray.
Why Save Your Car’s Memory?
You can use a memory saver (or a 9V battery) to preserve your car’s memory. For one, it prevents you from losing settings on devices such as stereo presets.
Additionally, on modern vehicles, the car’s computer memory gathers information during engine operation from many different system sensors, including ignition timing and injector pulse width, to improve driving. If your computer loses this information, the relearning process can take hundreds of miles of engine operation.
2. Perform a Battery Terminal Test
The battery terminal test helps you check if your terminals are making good contact with the battery posts. Basically, the test measures the voltage drop between the battery terminal and its post.
A high voltage drop indicates that the charging system is struggling to provide adequate charging voltage to the battery. This in turn means the battery is struggling to power the starting and fuel injection systems and other circuits during cranking and starting.
First, disable the fuel system by removing the fuel pump fuse. To find the fuse, look for the fuse box (inside the cabin) or the power distribution center (in the engine compartment). Removing the fuse will prevent the vehicle from starting during the test. On vehicle models with a distributor, you can prevent the engine from starting by disconnecting the ignition coil wire from the distributor. Then, you can use a jumper wire to connect the cable to a good engine ground (any unpainted metal part on the engine will do, such as a bolt or bracket).
Set your digital voltmeter to a low setting on the DC volts scale (direct current).
Connect the voltmeter’s negative lead to the terminal of the battery’s positive cable (the terminal marked with the “+” sign).
Connect the voltmeter’s positive (red) lead to the battery’s positive post.
Have an assistant apply the parking brake, put the transmission in Park (automatic) or Neutral (manual), and crank the engine for a few seconds, just enough to get a good voltage reading but less than 30 seconds. If you need to crank the engine again, let the starter rest for a minute or more before cranking the engine again.
If your voltmeter reads more than 0.1 V of voltage drop, the battery connections are loose or dirty. Inspect the connections for corrosion, looseness, or damage.
If the terminals are corroded or dirty, refer to the “Cleaning Battery Terminals” section below.
Repeat steps 3 to 6 on the other battery terminal, but connect the voltmeter’s negative lead to the battery’s negative post, the one with the “–” sign, and the voltmeter’s positive lead to the terminal.
How to Clean Battery Terminals
Corroded battery terminals will not allow the starting system to function properly or the charging system to recharge the battery. Cleaning battery terminals is a simple procedure.
Connect a memory saver or a 9V battery to the cables before disconnecting them to preserve the computer’s memory and other important settings.
Disconnect the battery cables.
Prepare a mixture of 8 oz of warm water and one tablespoon of baking soda in a small container.
Use a small, soft brush to apply the solution to the battery posts and terminals.
Scrub the corrosion and dirt off the posts and battery terminals with a battery terminal cleaning tool. This is a special brush for cleaning battery posts and terminals. To clean side terminals, use a small wire brush.
Wipe the cleaning solution off the posts and terminals using a shop cloth.
After reconnecting the terminals to the posts, apply a thin layer of petroleum jelly or white grease to the posts and terminals to prevent terminal corrosion.
Use a digital multimeter to test your battery and other systems affecting battery charge.
3. Perform a Battery Voltage Test
Maintenance-free batteries (those without removable caps) come with a charge indicator (test indicator eye) that tells you if your battery is charged (green eye), needs charging (no visible color), or if the battery needs to be replaced (yellow eye).
The battery voltage test is particularly useful on maintenance-free batteries as it can quickly tell you the state of charge and the battery’s condition. On regular batteries (those with removable caps), you can perform a test using a hydrometer, which can also tell you if your battery is functioning (see the Hydrometer Test section below).
Using a Digital Multimeter to Test the Battery:
First, turn on the high beam headlights for ten seconds. Then, turn them off and wait two minutes (you want to remove any charge above 12.6V, commonly called a surface charge).
Disconnect the negative (black) battery cable from the battery.
Set your digital multimeter to 20V on the DC voltage scale (DCV).
Connect the meter to the battery posts.
If you get a reading between 12.4 and 12.6, your battery is well charged. If you suspect a battery problem because you’ve had difficulty starting the engine, or you’ve had issues with another electrical circuit, or the alternator light on the dashboard comes on (charging system problems), your problem is not with the battery.
If you get a voltage reading below 12.4, the battery is undercharged. It’s possible you have issues with the battery itself (see the “state of charge” table below). Charge the battery and repeat the test. If you get the same readings (and the same problems) after charging the battery, you can take the battery to a store for a battery load test. This is one of the best ways to confirm the battery’s condition. Nevertheless, the following tests can further illuminate your battery’s condition before taking it to the store. Continue with the following tests.
Voltage
|
Voltage
|
Percentage Charge
|
|---|---|
|
12.6V or higher
|
100
|
|
12.4V
|
75
|
|
12.2V
|
50
|
|
12V
|
25
|
What Voltage Tells You About Your Battery’s State of Charge
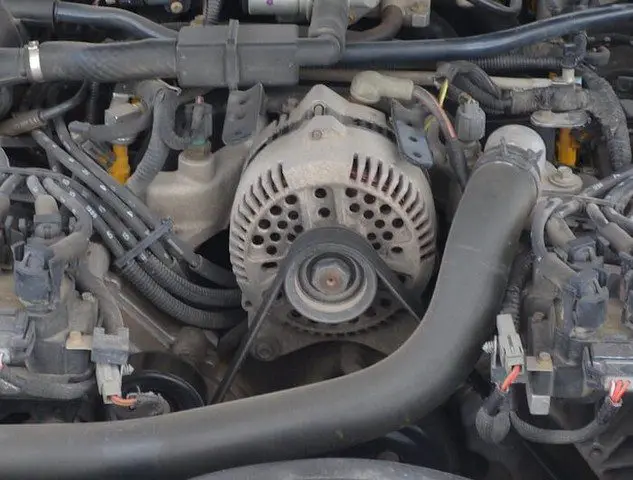
4. Perform a Quick Charging System Check
Another quick test you want to perform before proceeding is to do a quick charging system check. Make sure the negative and positive battery cables are properly connected and clean.
Set your voltmeter to 20V on the DC scale.
Have an assistant start the engine and run it at 2000 RPM.
Connect your meter leads to the battery posts.
Your meter should read between 13.5 and 14.5 volts (consult the vehicle’s repair manual for your model if necessary).
Note that you should get a steady reading. If the reading fluctuates, check the charging system wiring for a loose connection; another possibility is a faulty alternator or voltage regulator.
If your reading is lower or higher than your specifications, you may have a bad voltage regulator. Consult your vehicle’s repair manual; it might tell you how to perform a few quick alternator checks.
5. Battery Leak Test
If your battery appears to be in good physical shape and has good, clean, tight connections, it’s possible the battery is leaking its charge.
This can happen when you let the battery accumulate a layer of dirt or acid, especially around the top. This test is simple and quick. And all you need is your voltmeter.
Set your voltmeter to a low setting on the DCV voltage scale.
Connect the meter’s black lead to the battery’s negative post.
Touch the top of the battery at different spots with the meter’s red lead.
If your meter registers even a small voltage at any point, your battery is leaking its charge. You need to clean the battery.
Cleaning the Battery to Fix a Leak
In a small container, mix about 8 ounces of warm water and one tablespoon of baking soda.
Apply the mixture with a soft brush to the top of the battery and wipe the top with a shop cloth. If the battery has removable caps, be careful not to let the cleaning solution seep into the battery, otherwise it could deteriorate.
Make sure the top and the rest of the case are perfectly clean.
Repeat the leak test to ensure the discharge has stopped.
Leaving your headlights on or any other electrical device on after turning off the engine will drain your battery.
Leaving your headlights on or any other electrical device on after turning off the engine will drain your battery. | Source
6. Perform a Battery Drain Test
Current leaks are not the only causes of power loss in car batteries. Parasitic drains are another common source of electrical drains. A parasitic drain comes from electrical or electronic devices that remain active after cutting the engine and removing the ignition key.
Virtually all modern vehicles consume a bit of power after the engine is shut off, for example for the radio, clock, alarm, and computer modules. But these small normal parasitic drains can turn into electrical drains if you leave your car parked for a few days without starting the engine. Older batteries are more susceptible to this type of power loss than new ones.
Additionally, abnormal parasitic drains can appear suddenly. These come from electrical short circuits or worn devices that cause a circuit to remain powered when it shouldn’t be – a worn or faulty relay, or a module or switch that causes a load to stay on after turning off the ignition switch.
If you are not aware of the problem, the parasitic drain can discharge your battery overnight.
You can locate many abnormal parasitic drains using a simple method. During this drain test, make sure to keep the doors and trunk closed so that no bulb or dome light stays on. Also loosen the hood light bulb to turn it off, if necessary.
If you detect a parasitic drain, you will need to have access to the fuse box or power distribution center. If the fuse boxes are located inside the cabin, leave the front door(s) open, but use a clamp or similar device to hold the door switches in the off position.
You can use a memory saver or connect a 9V battery to the battery terminal for this test (see the Save Your Computer’s Memory box above).
Set your digital multimeter to read DC amps.
Remove the key from the ignition and keep all accessories off.
Disconnect the negative battery cable (the one with the “-” sign next to it).
Connect your meter’s negative (black) lead to the battery’s negative post.
Connect the meter’s positive (red) lead to the terminal of the cable you just disconnected.
NOTE: on some recent vehicle models, you may need to wait about 30 minutes after cutting the engine and connecting the ammeter to allow all computer modules to enter sleep mode. If necessary, consult your car’s owner’s manual.
Read the display on your voltmeter. On average, a normal reading should be between 0.01 and 0.5 amperes (this depends on the particular model, the number of electronic modules, and power devices that remain on after the engine is shut off). Your car’s owner’s manuals may give you the normal parasitic drain for your car model.
If you get a reading higher than 0.5 amperes or more, it’s likely you have a parasitic drain. This means a powered circuit is draining the battery.
If you suspect an abnormal parasitic drain, start pulling fuses. Pull one fuse at a time while watching the meter. When the high reading decreases, you have found the problematic circuit. You need to check if the circuit has a short circuit or a faulty device causing the drain (bulb, relay, module, etc.).
If you don’t find the source of the parasitic drain by pulling fuses