
Bad MAP Sensor Symptoms
A faulty Manifold Absolute Pressure (MAP) sensor can disrupt fuel distribution and ignition timing. Depending on your vehicle model, your engine may experience one or more of these performance issues:
- Rich air-fuel ratio
- Lean air-fuel ratio
- Poor fuel economy
- Failure to start
- Lack of engine power
- Stalling
- Detonation and misfires
However, these symptoms are not exclusively signs of a failing MAP sensor. Sometimes, a faulty sensor can trigger the Check Engine Light (CEL). If a trouble code has been stored in the computer’s memory indicating a problem with the MAP sensor, it’s a good idea to actually test the sensor to confirm that the issue is with the sensor and not another related component.
What you’ll need to troubleshoot a MAP sensor
Troubleshooting a MAP sensor is a simple procedure using a digital multimeter (DMM) and a hand vacuum pump. If you don’t have the pump, your local auto parts store may lend you one.
In the following sections, you’ll find important information about the sensor, things to consider during your inspection, and a simple MAP sensor testing procedure. Keep in mind that these tests apply to naturally aspirated four-stroke internal combustion gasoline engines. If necessary, consult the vehicle repair manual for your specific model.
Answers you’ll find in this article
 I. What does a MAP sensor do?
 I. What does a MAP sensor do?
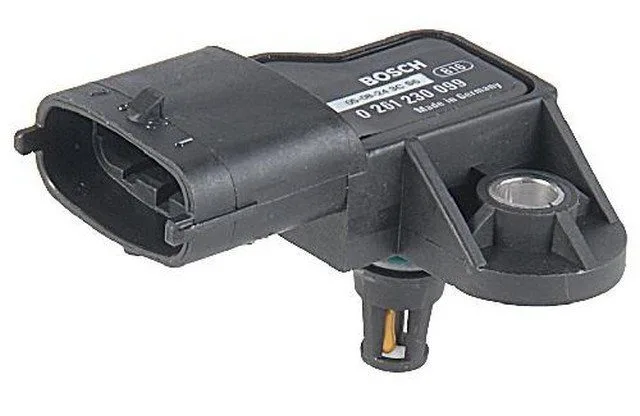
Basically, a MAP sensor reads the amount of air pressure relative to vacuum inside the intake manifold, directly or using a vacuum hose. Then, it translates this pressure into a voltage signal that the sensor sends to the Powertrain Control Module (PCM), your car’s computer.
The sensor uses a 5-volt reference signal from the computer to return the signal.
Changes in vacuum or air pressure in the intake manifold cause the sensor’s electrical resistance to vary, increasing or decreasing the signal voltage to the computer.
The PCM uses the information from the MAP sensor along with data from other sensors to adjust fuel distribution to the cylinders and ignition timing based on the current engine load and speed.
2. Does my car have a MAP sensor?
Instead of a MAP sensor, most modern vehicles use a Mass Air Flow (MAF) sensor that the computer uses to calculate airflow as well as engine speed.
Some vehicles are equipped with both a MAP and MAF sensor, typically forced induction systems like turbocharged and supercharged models.
Sometimes, the MAP sensor is used to monitor EGR operation and serves as a backup to the MAF sensor.
If you need information regarding your vehicle, consult the repair manual for your particular make and model. You can buy an inexpensive Haynes manual on Amazon. These manuals contain procedures for many maintenance, troubleshooting, and component replacement projects. So the manual practically pays for itself after the first maintenance or repair project.
Caution: when checking voltages
Use the repair manual for your particular vehicle make and model for diagnostic value specifications.

3. P0105 and other MAP trouble codes
Sometimes, a malfunction in the MAP sensor or its circuit triggers the Check Engine Light (CEL).
By scanning the computer, you may find a series of P010X codes stored in memory.
Here is a brief description of these codes:
- P0105: MAP sensor circuit malfunction.
- P0106: MAP sensor circuit, range, or performance failure.
- P0107: Circuit, low input.
- P0108: MAP sensor circuit, high input.
- P0109: MAP sensor circuit, intermittent failure.
Other related codes include P0068 and P0069.
You can find a more detailed description of these codes in your vehicle’s repair manual or by doing an online search.
Read the description of the code you found and the potential cause of the error resulting from this code carefully.
Remember that even if the code points to the potential problem, the circuit or component in question may not be at fault. Instead, an associated component may have triggered the code.
For example, in many applications, a leaking vacuum hose or a faulty Throttle Position Sensor (TPS) can cause a trouble code that points to a defective MAP sensor.
Troubleshooting the sensor is the only way to determine if the sensor or part is actually faulty.
On some models, you only need to remove a few screws to access the sensor.
4. MAP sensor location
The MAP sensor is usually located in a few key spots around the upper area of the engine compartment.
- Intake manifold. Under or near the throttle body; this might be the most common location.
- Inner fender.
- Firewall.
- Air filter assembly.
- Under the dashboard.
The sensor may connect to the intake manifold with a vacuum hose or directly, by sitting on top of the intake manifold.
Caution: when using a digital multimeter
Always use a digital multimeter with a minimum impedance of 10 megohms, to avoid damaging your vehicle’s sensitive electronic and electrical devices.

5. How to test a MAP sensor
When testing a MAP sensor, first perform a preliminary check.
The sensor connects to the intake manifold with a rubber hose, depending on your particular application; otherwise, it connects directly to the intake.
When problems occur, it’s more likely that the vacuum hose is failing. Inside the sensor and the engine compartment hose are exposed to high temperatures, potential contamination from oil and fuel, and vibrations that can affect their operation.
Check the vacuum hose for:
- loose connections
- cracks
- swelling
- softening
- hardeningThen, check that the sensor body is not damaged and make sure the electrical connection is tight, clean, and the wiring is good.
Compare your readings to the specifications listed in your vehicle’s repair manual. | Source
6. Checking the MAP sensor reference signal
The MAP sensor uses a three-wire connector. You need to identify the signal, reference, and ground wires using your vehicle’s repair manual.
Checking the reference voltage:
Turn the ignition key to the On position but do not start the engine. This will allow the computer to provide a reference voltage to the MAP sensor.
Set your multimeter to about 10 V on the DC voltage (DCV) scale.
Probe the reference wire at the connector. The reading should show 5 volts or close to it.
If your voltage is lower, visually inspect the connector and the wire between the sensor and the PCM for any damage. You may need to measure this voltage on the same wire, but on the computer side.
If you still get low voltage on the computer side, you need to check the computer.
Otherwise, if the voltage rises to 5 volts, there is a problem in the wire between the computer and the sensor.
Turn off the ignition key.
Checking the signal voltage:
Disconnect the vacuum hose from the sensor.
Connect a hand vacuum pump to the sensor, but do not apply vacuum to the sensor yet.
Probe the signal on the electrical connector using the red DMM probe. Connect the black DMM probe to ground using any metal surface on the engine or the battery’s negative terminal.
Turn the ignition switch to the On position, but do not start the engine.
Your voltage reading should be between 4.6 and 5 volts.
Apply 5 in-Hg of vacuum to the sensor. The reading should be about 3.75 volts.
Now, apply 20 in-Hg of vacuum to the sensor. The voltage should be about 1 volt.
Your readings may vary slightly, depending on altitude and current weather conditions.
NOTE: In some repair manuals, you are asked to check resistance when applying vacuum to the sensor. Follow the instructions in your manual and compare your results to the listed specifications.
The following table shows the approximate voltage drop of the MAP sensor’s return signal when a specific amount of vacuum is applied. Use these values as a general reference.
Also watch the video towards the end of this article which gives you a visual reference on troubleshooting an analog MAP sensor using a digital multimeter and a hand vacuum pump.
MAP Sensor Voltage Drop Reference Table
|
Vacuum
|
Voltage drop
|
|---|---|
|
5 in-Hg
|
0.7 to 1.0 Volts
|
|
10 in-Hg
|
1.3 to 1.9 Volts
|
|
15 in-Hg
|
2.0 to 2.8 Volts
|
|
20 in-Hg
|
3.0 to 3.8 Volts
|

7. Testing a digital MAP sensor
If your vehicle uses a digital MAP sensor, instead of an analog sensor, you can also test it using a digital multimeter capable of measuring frequency signals.
First, set your multimeter to about 100 or 200 hertz.
Disconnect the vacuum hose from the sensor and connect a hand vacuum pump to the sensor’s vacuum port.
Probe the signal and ground wires at the sensor’s electrical connector.
Turn the ignition key to the On position but do not start the engine.
Take note of the voltage, duty cycle, and frequency readings on your meter.
Now, apply about 18 in-Hg of vacuum to the sensor and note the voltage, duty cycle, and frequency readings on your meter.
Your sensor should have roughly the same voltage and duty cycle readings in both tests.
With no vacuum applied, the sensor should have about 160 hertz.
Once vacuum is applied, the sensor should drop to about 100 hertz.
Consult your vehicle’s repair manual for specifications.
On some models, you may need to use a screwdriver or Torx bit to remove the MAP sensor.
8. Replacing the MAP sensor
Replacing a MAP sensor is a simple operation. Sometimes, the sensor is easily accessible and you can replace it in about 5 minutes or less; other times, you may need to remove one or more accessories to access it.
Regardless, the following procedure will help you replace the sensor. If your vehicle’s sensor uses a vacuum hose, it’s a good idea to replace it with the sensor.
Consult your vehicle repair manual, if necessary,
Disconnect the negative battery cable and secure the cable away from the post.
Depending on the sensor’s location, you may need to remove one or more Torx bolts or screws.
Disconnect the sensor’s electrical connector. The connector may be locked in place. If so, press the locking tab, then disconnect the connector.
Detach the vacuum hose from the sensor, if it has one.
Detach the vacuum hose from the other end.
Use the old vacuum hose as a guide to cut the new one to the correct length, if necessary.
Connect the new hose to the fitting on the intake manifold side and the other end to the new MAP sensor.
Plug in the sensor’s electrical connector. Make sure the connector locks onto the sensor.
Mount the new sensor in place.
Connect the negative battery cable to the battery terminal.