
Common Signs of a Failing Brake Booster
Not sure if you have a bad brake booster?
Here are three common signs of a brake booster failure:
- You need more effort to apply the brakes (stiff brake pedal).
- The brake pedal does not return to its original position on its own.
- The engine RPM drops when you press the brake pedal at idle.
Before condemning the booster, however, you need to confirm that the unit has failed. This simple guide briefly explains how the conventional vacuum-powered brake booster (found in most gasoline engine vehicles) works. The guide will then walk you through a series of simple tests you can apply at home in a few minutes to save time and money on repairs.
The tests are divided into separate sections for easier diagnosis. For most tests, you won’t need any tools to know that the booster has failed. But, if you still need further confirmation, you’ll also find a series of tests that use a simple vacuum gauge and a hand vacuum pump to confirm your findings.
First, let’s briefly see how a common brake booster works to help you understand the simple tests you need to do.
I. Brake Booster Operation
II. How to Perform a Simple Vacuum Hose and Brake Booster Check
III. My Engine Misfires When I Press the Brake Pedal
IV. Checking Engine Vacuum with a Vacuum Gauge
V. Checking the Brake Booster with a Hand Vacuum Pump

I. Brake Booster Operation
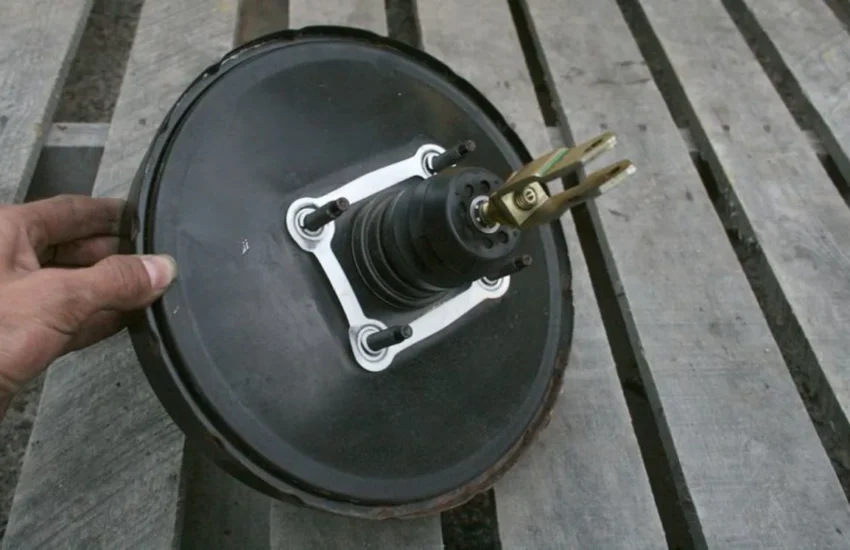
Basically, the brake booster in your car helps to multiply the pressure you apply to the brake pedal when slowing down or stopping the vehicle. You can find the brake booster (a large can) mounted on the driver’s side of the firewall inside the engine compartment.
The booster has a simple setup. A flexible diaphragm divides the brake booster into a front chamber (engine side) and a rear chamber (driver side), providing an airtight seal between the two. On the outside, a thick hose connects the front chamber of the booster to the intake manifold as a vacuum source.
A push rod (aka power piston) runs through the center of the brake booster. At one end, the rod connects to the brake pedal and to the brake master cylinder at the other.
The brake master cylinder attaches to the front and center of the brake booster. On a conventional booster, at the center of the push rod, you’ll find a normally open valve that allows vacuum to enter the rear chamber. Also, the rear of the push rod works as a normally closed valve to keep atmospheric pressure out of the rear chamber until you press the brake pedal. So, when the brake pedal is at rest, both the front and rear chambers have vacuum.
When you press the brake pedal to slow down or stop the vehicle, you also press the rear and center valves. So the rear valve opens, allowing atmospheric pressure to enter the rear chamber. At the same time, the center valve closes the diaphragm valve, blocking vacuum from entering the rear chamber. Then, atmospheric pressure and vacuum help you push the rod against the master cylinder, which uses a hydraulic system to apply the brakes without too much effort on your part.
Note: On some models, both sides of the diaphragm contain atmospheric pressure when the brake pedal is at rest. When you press the brake pedal, a vacuum forms at the front of the brake booster.
Now that you know how the brake booster in your car works, you can use this knowledge to troubleshoot the unit using a series of simple tests, without and with tools.
II. How to Perform a Simple Vacuum Hose and Brake Booster Check
Before checking the booster, it’s a good idea to inspect the vacuum hose, fittings, and check valve. This is where most failures affecting the brake booster operation occur.
How to Check the Booster Vacuum Hose
First, apply the parking brake and open the hood.
Locate the brake booster mounted on the driver’s side of the firewall inside the engine compartment.
Visually inspect the hose that connects the brake booster to the intake manifold.
Look for hardened spots, cracks, swollen or collapsed areas, holes, or other types of damage. Also, make sure the hose is properly connected (not loose); replace the hose if necessary.
Next, check the one-way valve that connects the vacuum hose to the brake booster for cracks, looseness, or damage (some vehicle models use an inline check valve between the brake booster and the intake manifold). The valve must allow flow from the brake booster to the intake manifold to create a vacuum.
The valve must allow flow from the brake booster to the intake manifold to create a vacuum. So, disconnect the hose at the intake manifold and blow through the hose. If air passes through, replace the booster check valve.
Check the manifold port for buildup (where the hose connects to the manifold).
Now check for signs of brake fluid leakage between the brake booster and the brake master cylinder. If you see a wet or dark area running from the center down the brake booster, you most likely have a brake fluid leak and fluid may have entered the booster chamber. Take your car to the shop for inspection, if necessary. You may need to replace the brake master cylinder and possibly the brake booster.
Start the engine and let it idle.
Spray soapy water along the vacuum hose, check valve, and intake manifold fitting. If you see bubbles and water being sucked in at any spot, you’ve found a vacuum leak. Replace the hose, fitting, or booster check valve as needed.
Stop the engine.

How to Check the Brake Booster
- If the booster vacuum hose and fittings are in good condition, it’s time to move on to the brake booster itself. A common and simple way to test the brake booster is by using the brake pedal.
- Sit behind the steering wheel, set the transmission to Park (automatic) or Neutral (manual), set the parking brakes, and start the engine. Let it idle for two minutes, then turn it off.
- Pump the brake pedal at normal foot pressure four times and hold your foot on the pedal, pressing lightly.
- Start the engine. When you start the engine, you should feel the brake pedal move slightly downward, about an inch or less. Otherwise, you don’t have enough vacuum in the brake booster. To locate the fault, perform the engine vacuum and brake booster tests described in the following sections.
- With the engine still idling, remove your foot from the brake pedal and turn off the engine.
- Press the brake pedal four times (using normal foot pressure). If you notice the pedal rising after the second or third press, the booster is most likely holding vacuum. Otherwise, a vacuum leak is affecting booster performance. To locate the problematic area, test engine vacuum and brake booster performance using a vacuum gauge and a hand vacuum pump, as described in the following sections.
- Start the engine and let it idle.
- Now, press the brake pedal and turn off the engine, but keep the pedal pressed for about 30 seconds after turning off the engine.
- The pedal should hold its position. Otherwise, there is a leak in the brake booster, valve, vacuum hose, or intake manifold. Check the vacuum hose, booster check valve, engine vacuum, and brake booster as described in the following sections.
- If you feel the brake pedal is too hard during driving and the vacuum hose and check valve are working properly, you will likely need to replace the brake booster. Troubleshoot the brake booster using a hand vacuum pump as described in the following section.
A brake booster leak can cause an engine misfire. | Source
III. My Engine Misfires When I Press the Brake Pedal
An internal brake booster leak can manifest as an engine misfire.
If an internal valve or the diaphragm is failing, it can cause a lean air/fuel ratio and a misfire when you press the brake pedal, usually at idle.
If you know the vacuum hose, check valve, and intake manifold fitting are in good condition, use this simple test to check if the misfire is coming from the brake booster:
Start the engine and let it idle.
Set the parking brake.
Cover a portion of the hose with a cloth.
Have an assistant press the brake pedal.
Pinch the hose with a pair of pliers using the cloth as a protector to avoid damaging the hose.
If the engine idles smoothly and the misfire stops, the brake booster is causing the misfire and needs to be replaced.

IV. Checking Engine Vacuum with a Vacuum Gauge
Your brake booster may be doing its job. Yet, you may have noticed during your tests or daily driving that something is wrong. And you might be right.
If your booster barely passed the previous tests (or didn’t), check that your booster is receiving the correct amount of vacuum. That’s what you’ll do here. For this test, you’ll need a vacuum gauge.
Disconnect the vacuum hose from the brake booster and reconnect it using a T-fitting so you can also connect a vacuum gauge.
Start the engine.
Your gauge should read between 16 and 21 inHg (inches of mercury). If you get less than 16 inHg, check for a vacuum leak at the hose, intake manifold (a leak or crack from the gasket to the manifold itself), your engine (valve(s), head gasket); or a possible restriction in the intake either at the vacuum hose, the intake manifold port, or the exhaust system (catalytic converter).
V. Checking the Brake Booster with a Hand Vacuum Pump
If your previous tests indicate brake booster failure but you still need to confirm your diagnosis, use a hand vacuum pump. These tests are simple and take only a few minutes.
If you don’t have a hand vacuum pump, you can rent one from your local auto parts store.
- Let the engine idle for about 20 minutes so it reaches operating temperature.
- Stop the engine and disconnect the vacuum hose from the brake booster vacuum check valve.
- Connect the vacuum pump to the check valve using one of the hoses provided with the tool.
- Then, apply 20 inHg of vacuum to the brake booster.
- Wait 5 minutes. The booster must hold the vacuum without leaking; otherwise, replace it (assuming the vacuum check valve and mounting gasket are good).
- Now, without disconnecting the pump, press the brake pedal once. You should see the vacuum drop by about 5 to 10 inHg. If the brake booster vacuum remains at 20 inHg or drops to zero, replace the brake booster.
Apply vacuum to the booster with the pump to bring it back to 20 inHg. - Press the brake pedal and hold it for 30 seconds. You should see the booster vacuum drop a little and then remain stable for the remaining 30 seconds. If the vacuum drops significantly, replace the brake booster.
The troubleshooting procedures described here apply to the common vacuum brake booster, but configurations may differ in some respects. If you still think your tests don’t seem conclusive or your booster comes with a different configuration, consult the repair manual for your vehicle’s make and model. The manual will show you what additional tests you need to apply to your particular booster. You can buy an inexpensive aftermarket repair manual at your local auto parts store or online. Buying the manual is a good investment as it comes with many troubleshooting procedures for many car problems, a maintenance schedule, and how to perform those maintenance tasks.