La Corvette E-Ray surprend avec l’auto-stop/start : entre V8 rugissant et sobriété imposée, ce compromis fait débat. Découvrez notre analyse.
Read more....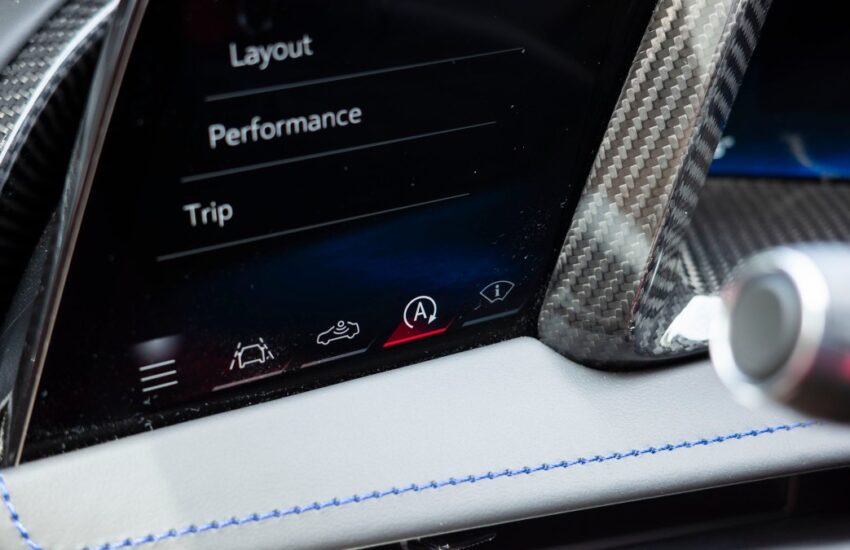
La Corvette E-Ray surprend avec l’auto-stop/start : entre V8 rugissant et sobriété imposée, ce compromis fait débat. Découvrez notre analyse.
Read more....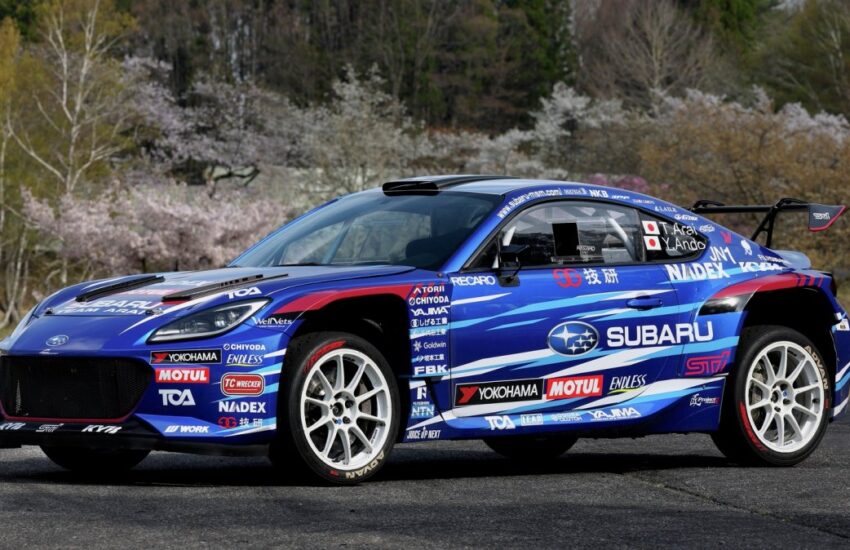
Subaru surprend en engageant la BRZ Boxer Rally Spec.Z en championnat du Japon : 276 ch, transmission intégrale et turbo, pour des rallyes 2026.
Read more....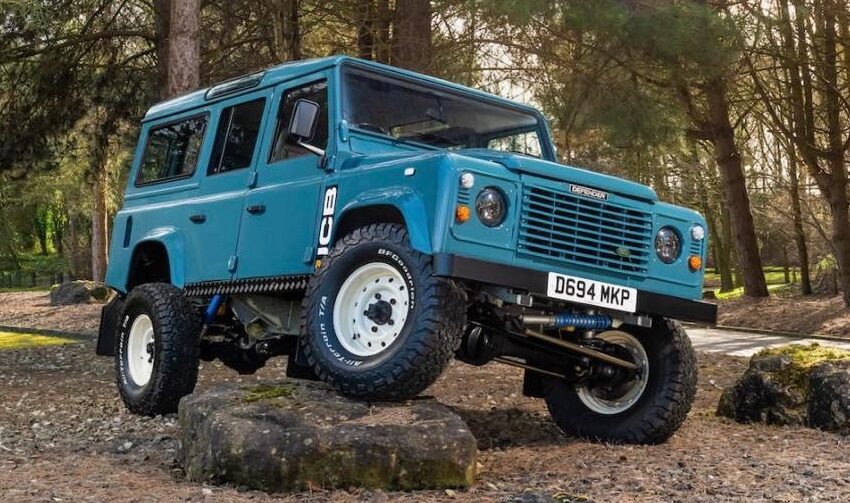
Un Land Rover Defender unique avec moteur de tractopelle JCB est à vendre. Fiable, robuste et exportable – dépensez votre remboursement d’impôts malin.
Read more....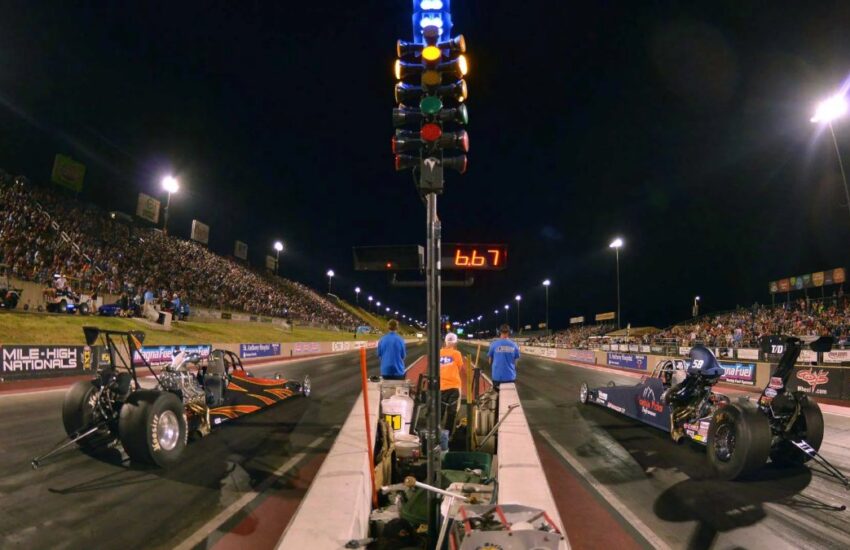
Le légendaire circuit de dragster Bandimere Speedway, fermé en 2023, va rouvrir près de Hudson dans le Colorado. L’approbation municipale est acquise.
Read more....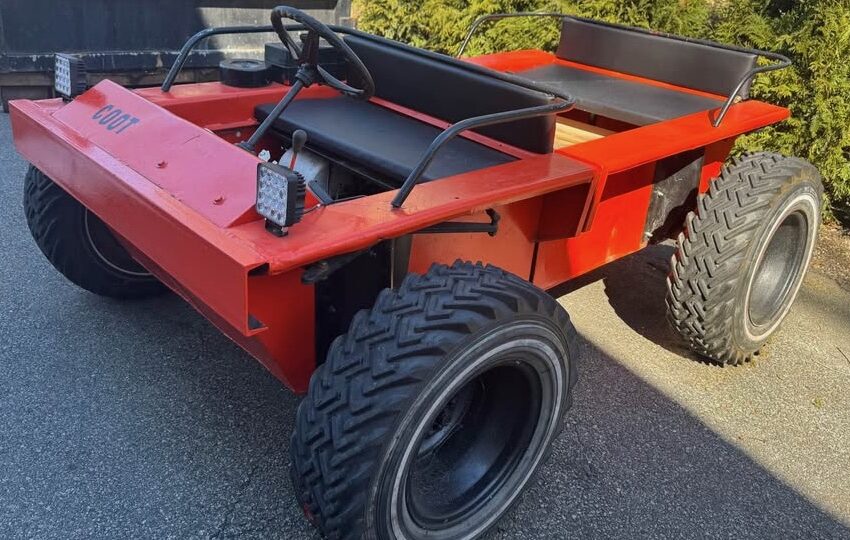
Découvrez ce VTT amphibie des années 1970 à quatre roues directrices. Un Coot 1970 rare en vente à 3800$. Idéal pour collectionneurs.
Read more....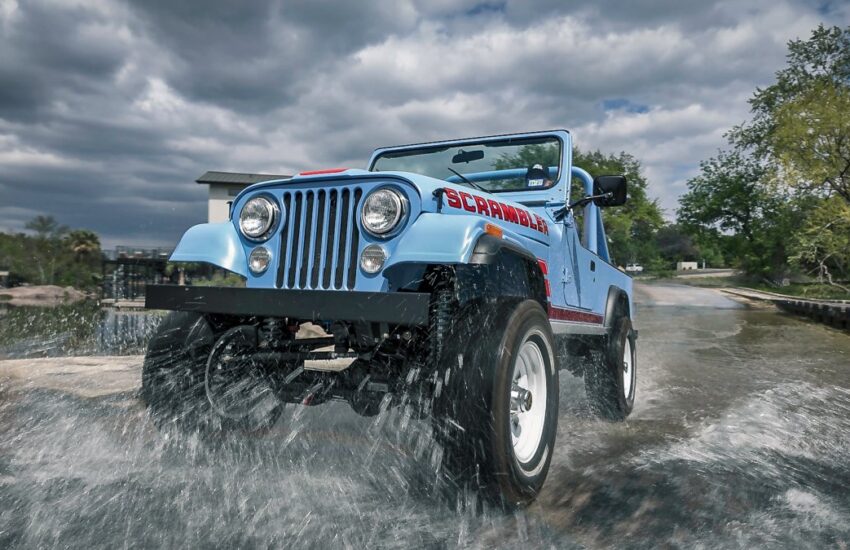
Le restomod Jeep Scrambler V8 Stellar par Vigilante 4×4 : un ancien CJ transformé en pickup de rêve à 260 000 $. Performances et exclusivité.
Read more....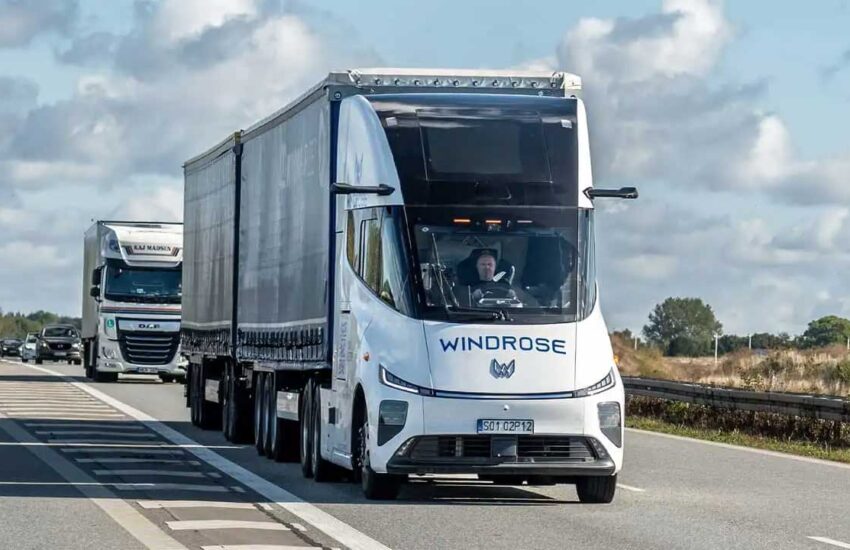
Découvrez le camion électrique Windrose avec 705 kWh et double recharge, un concurrent sérieux de Tesla sur le marché américain.
Read more....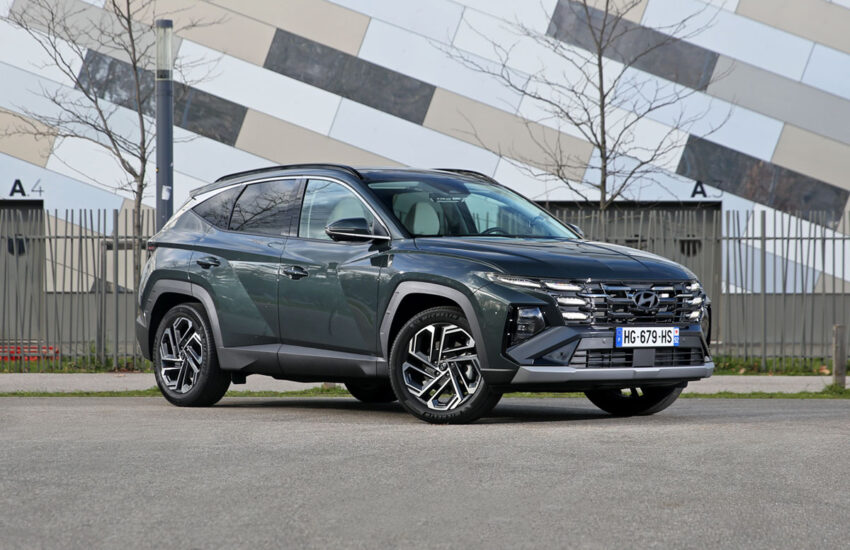
Découvrez notre analyse détaillée des performances et consommations du Hyundai Tucson HEV, un SUV hybride performant et économique.
Read more....
Renault lance Care Fleet pour aider les soignants avec 50 voitures électriques reconditionnées dans les déserts médicaux de France.
Read more....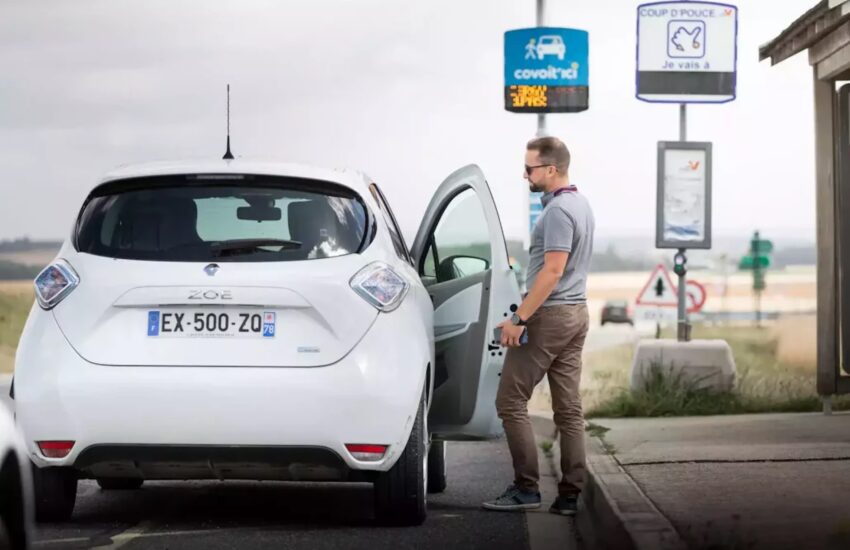
Le covoiturage explose en France avec la hausse des prix des carburants, établissant un record sur BlablaCar et favorisant des économies significatives.
Read more....